
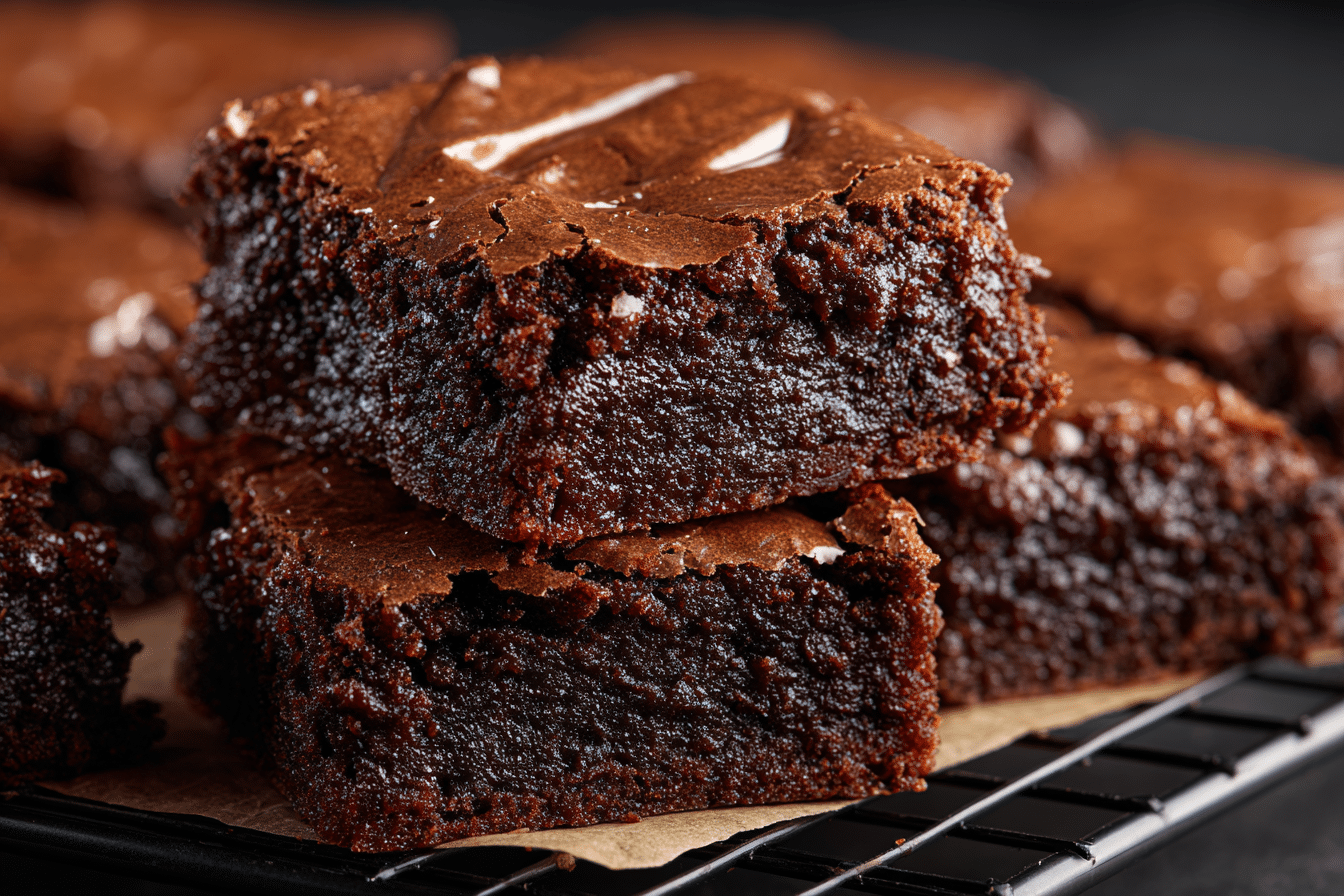
If you love the deep richness of classic brownies and the chewy, stretchy texture of mochi, then Chocolate Mochi Brownies are your dream dessert come true. Inspired by Verna Gao’s viral recipe, this East-meets-West fusion combines the satisfying chew of glutinous rice flour with intense cocoa flavor — delivering a gluten-free treat that’s moist, gooey, and completely addictive.
Originating from the blending of Japanese and Hawaiian dessert traditions, mochi brownies have surged in popularity thanks to their unique mouthfeel and easy prep. These brownies are crisp on the edges, fudgy in the middle, and stretchy with every bite — like a soft mochi nestled inside a brownie crust.
Perfect for potlucks, gifting, or an afternoon pick-me-up, this recipe is about to become your go-to for something truly different yet incredibly comforting.
Ingredients Overview
Each ingredient plays a key role in creating the signature texture and bold chocolate flavor of mochi brownies. Let’s break them down:
-
Glutinous Rice Flour (Mochiko): This is the star ingredient. Despite the name, it’s gluten-free. It creates that signature chew and slight bounce in every bite. Don’t substitute with regular rice flour — it won’t work.
-
Unsweetened Cocoa Powder: Use a high-quality Dutch-processed or natural cocoa powder for a rich, deep chocolate flavor. The cocoa gives that classic brownie taste while pairing beautifully with the mochi base.
-
Coconut Milk: Full-fat coconut milk adds moisture and richness while keeping the texture soft and slightly sticky. It also gives subtle tropical undertones that complement the chocolate.
-
Sugar: Regular granulated sugar sweetens the batter and helps develop the caramelized edges. Brown sugar can also be used for added depth.
-
Eggs: Provide structure and richness. They help the batter set properly while adding a bit of fluff to the chew.
-
Butter: Adds flavor and contributes to a silky, tender crumb. Melted butter makes the batter smooth and easy to work with.
-
Vanilla Extract: Adds warmth and enhances the chocolate notes.
-
Salt: Balances the sweetness and intensifies the cocoa.
Optional Add-Ins
-
Chocolate chips or chopped dark chocolate
-
Instant espresso powder (to enhance the cocoa flavor)
-
Toasted black sesame seeds for a nutty crunch
-
Shredded coconut for texture and aroma
Substitution Options
-
Dairy-Free: Use vegan butter and ensure your chocolate is dairy-free.
-
No Coconut Milk? Swap with whole milk and a bit of cream, though the texture may be slightly less rich.
-
Sugar Alternatives: Coconut sugar or monk fruit sweetener works but may slightly alter texture.
Step-by-Step Instructions
1. Prepare Your Pan & Oven
Preheat your oven to 175°C (350°F). Line an 8×8-inch square pan with parchment paper, leaving overhangs for easy lifting. Grease lightly for extra insurance.
2. Melt Butter
In a saucepan or microwave-safe bowl, melt your butter. Allow it to cool slightly so it doesn’t scramble the eggs in the next step.
3. Mix Wet Ingredients
In a large bowl, whisk together the eggs, sugar, and vanilla until smooth and slightly frothy. Slowly add the melted butter, then whisk in the coconut milk until well combined.
4. Combine Dry Ingredients
In another bowl, whisk together the glutinous rice flour, cocoa powder, and salt. Sift if needed to remove any lumps — mochi flour can clump easily.
5. Mix the Batter
Add the dry ingredients into the wet, stirring until a smooth, glossy, thick batter forms. It will be looser than traditional brownie batter but sticky and stretchy — exactly what you want.
6. Add Toppings
Fold in any chocolate chips, sesame seeds, or coconut now. Pour the batter into your prepared pan and smooth the top.
7. Bake
Bake for 45–55 minutes, depending on your oven. The top should be crackled and shiny, the edges slightly pulled away from the pan, and the center set but still soft when pressed gently.
8. Cool Completely
Let the brownies cool completely before slicing — this is key! Mochi texture firms up as it cools and becomes perfectly chewy.
Tips, Variations & Substitutions
Cooking Tips
-
Let them cool fully: Mochi brownies need time to set and firm up. Cutting them too soon can lead to gummy texture.
-
Don’t reduce sugar too much: Sugar contributes to moisture and browning. For best texture, stick close to the original quantity.
-
Use full-fat coconut milk: Light versions or boxed alternatives might water down the batter.
Fun Variations
-
Matcha Mochi Brownies: Replace 1 tablespoon cocoa powder with matcha powder for a vibrant green twist.
-
Black Sesame Swirl: Mix tahini or black sesame paste into the batter or drizzle on top for visual appeal and flavor contrast.
-
Ube Mochi Brownies: Add ube extract and swirl with ube halaya (purple yam jam) for a Filipino-inspired version.
Dietary Adjustments
-
Egg-Free: Try 2 flax eggs (2 tbsp flaxseed meal + 6 tbsp water). The result may be slightly less fluffy but still chewy.
-
Low Sugar: Reduce sugar by ¼ cup max for a less sweet version.
-
Nut-Free: This recipe is naturally nut-free unless you add toppings like almond or hazelnut.
Serving Ideas & Occasions
Mochi brownies are incredibly versatile and can be dressed up or down:
-
Serve warm with a scoop of vanilla or coconut ice cream for dessert.
-
Dust with powdered sugar or drizzle with melted dark chocolate for a party platter.
-
Pair with a matcha latte or espresso for a cozy afternoon snack.
These are perfect for:
-
Birthday parties
-
Picnics and potlucks
-
Gluten-free holiday tables
-
Sweet gifts wrapped in parchment and ribbon
Their unique chew and rich flavor make them a talking point at any gathering.
Nutritional & Health Notes
Mochi brownies are gluten-free by nature, thanks to glutinous rice flour. They’re higher in carbohydrates due to the rice flour and sugar but also offer:
-
Good fats from coconut milk and butter
-
Antioxidants from cocoa
-
A satisfying dessert with no need for wheat flour or leaveners
For a lighter version:
-
Use less sugar and butter
-
Skip chocolate chips
-
Cut smaller servings (they’re rich and satisfying)
Each square contains around 200–250 calories depending on size and mix-ins.
FAQs
Q1: What is glutinous rice flour and can I substitute it?
A1: Glutinous rice flour, also called Mochiko, is made from sticky rice. Despite the name, it’s gluten-free. No, it cannot be substituted with regular rice flour — the texture won’t be chewy or stretchy.
Q2: Why are my mochi brownies gummy or too soft?
A2: If they’re underbaked or still hot, the texture can seem too soft. Let them cool completely before judging. Also, make sure to measure coconut milk and flour accurately.
Q3: Can I make mochi brownies ahead of time?
A3: Yes! They taste even better the next day. Store at room temperature for 2–3 days or refrigerate for up to 5. The texture becomes denser and chewier over time.
Q4: How do I store and reheat them?
A4: Store in an airtight container. To reheat, microwave for 10–15 seconds for a warm, chewy bite. Avoid over-heating or they can become rubbery.
Q5: Can I freeze chocolate mochi brownies?
A5: Yes. Wrap tightly in plastic wrap and place in a freezer-safe bag. Freeze for up to 2 months. Thaw at room temperature or microwave gently.
Q6: Why does the batter seem runny?
A6: That’s normal for mochi batter. Unlike regular brownie batter, it’s looser and more fluid due to coconut milk. Once baked and cooled, it sets into a firm, chewy square.
Q7: Are mochi brownies gluten-free?
A7: Yes. As long as you use glutinous rice flour (Mochiko) and double-check that all other ingredients (especially chocolate) are gluten-free, this recipe is safe for those with gluten sensitivities.
PrintChoco Mochi Brownies – Chewy, Gooey, and Irresistible
A chewy, rich twist on classic brownies made with glutinous rice flour and cocoa. These gluten-free chocolate mochi brownies are fudgy, stretchy, and totally addictive.
- Prep Time: 10 minutes
- Cook Time: 50 minutes
- Total Time: 1 hour
- Yield: 9 large squares 1x
Ingredients
-
1 cup glutinous rice flour (Mochiko)
-
½ cup unsweetened cocoa powder
-
1 cup full-fat coconut milk (shake well before opening)
-
½ cup unsalted butter, melted
-
¾ cup granulated sugar
-
2 large eggs
-
1 tsp vanilla extract
-
¼ tsp salt
-
Optional: ½ cup chocolate chips or chopped dark chocolate
Instructions
-
Preheat oven to 175°C (350°F). Line an 8×8-inch pan with parchment paper and grease lightly.
-
In a large bowl, whisk eggs, sugar, and vanilla until combined.
-
Add melted butter and coconut milk. Mix well.
-
In a separate bowl, combine glutinous rice flour, cocoa powder, and salt.
-
Add dry ingredients to the wet and stir until smooth.
-
Fold in optional chocolate chips or toppings.
-
Pour into prepared pan and bake for 45–55 minutes until edges are set and top is crackly.
-
Cool completely before slicing.
Notes
-
Store at room temperature up to 3 days or refrigerate for 5 days.
-
For vegan version: use flax eggs and plant-based butter.
-
To freeze: wrap tightly and freeze up to 2 months.