
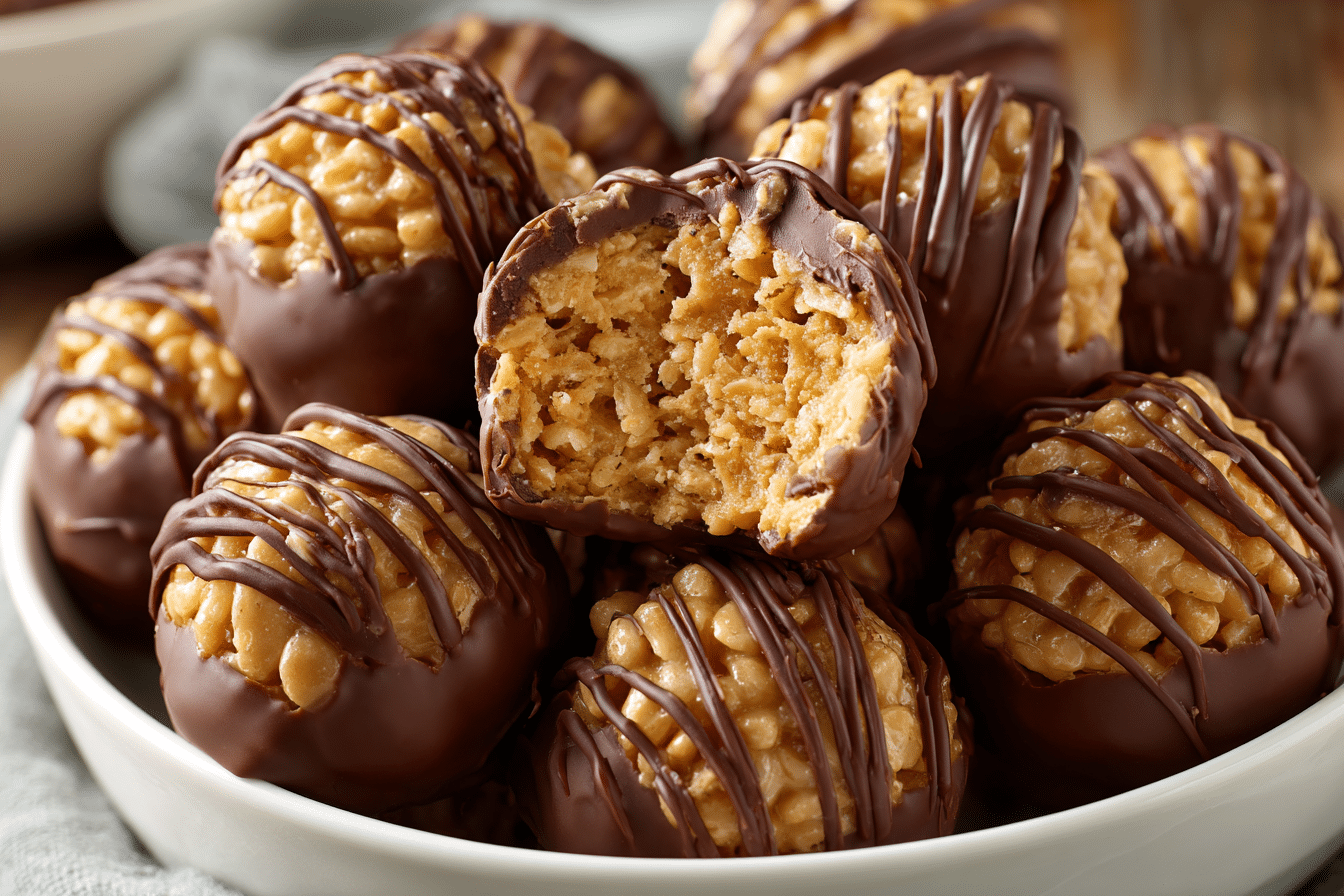
These no-bake peanut butter Rice Krispie balls are an irresistible twist on the classic Rice Krispie treat — chewy, crunchy, sweet, salty, and coated in chocolate. They come together with just 5 pantry staples and no oven required, making them one of the easiest and most addictive holiday or everyday snacks you can make.
Perfect for cookie exchanges, Christmas platters, lunchbox treats, or a quick sugar fix, these bite-sized morsels deliver big flavor with minimal effort. The combination of creamy peanut butter, crispy cereal, and smooth chocolate creates a nostalgic yet indulgent treat everyone loves.
Whether you’re making these with kids or prepping a big batch for a party, these no-bake peanut butter balls are a crowd-pleaser you’ll want to keep in your recipe rotation.
Ingredients Overview
These Rice Krispie peanut butter balls come together with just 5 essential ingredients:
-
Creamy Peanut Butter: The base of the mixture, giving rich, nutty flavor and smooth texture. Choose a traditional peanut butter (not natural or runny) for best structure.
-
Unsalted Butter: Helps bind the ingredients and adds richness. Room temperature or melted butter works best for even mixing.
-
Powdered Sugar: Adds sweetness and helps firm up the mixture into scoopable dough. It also balances the saltiness of the peanut butter.
-
Crispy Rice Cereal: Brings the signature crunch and light texture. Use fresh cereal for optimal crispness.
-
Chocolate Chips or Melting Chocolate: For dipping or drizzling. Semi-sweet or milk chocolate both work well. Choose melting wafers for a smoother coating if desired.
Ingredient Tips & Swaps
-
Chunky Peanut Butter: Adds extra texture if you want bits of peanut in every bite.
-
Almond Butter or Sunflower Butter: Great alternatives for peanut-free homes.
-
White Chocolate Coating: A sweet twist that works well for festive occasions.
-
Sprinkles or Crushed Nuts: Optional toppings that add flair and texture.
Step-by-Step Instructions
1. Mix Peanut Butter and Butter
In a large bowl, combine peanut butter and softened (or slightly melted) butter. Stir until smooth and fully combined.
If using a microwave, warm the mixture in 15-second intervals just until it stirs easily — you don’t want it hot.
2. Add Powdered Sugar
Gradually mix in powdered sugar, stirring until the mixture becomes thick and dough-like. It should hold its shape when scooped.
Use a spatula or wooden spoon — the mixture will become thick but pliable.
3. Fold in Rice Krispies
Add the Rice Krispies cereal and gently fold them into the peanut butter mixture. Work slowly to avoid crushing the cereal too much.
The dough will be firm and slightly sticky, but should hold together when rolled.
4. Shape into Balls
Use a small cookie scoop or tablespoon to portion the mixture into even-sized balls. Roll between your hands to shape.
Place the balls on a parchment-lined baking sheet. Once all are rolled, chill in the fridge for 20–30 minutes to firm up before dipping.
5. Dip in Chocolate
Melt chocolate chips or melting wafers in a microwave-safe bowl in 20-second intervals, stirring between each, until smooth.
Dip each ball halfway or fully into the melted chocolate, letting the excess drip off. Place back on the parchment and decorate with sprinkles or chopped nuts if desired.
Let set at room temperature or chill for faster hardening.
Tips, Variations & Substitutions
-
Make it Festive: Add holiday sprinkles, crushed candy canes, or drizzle with colored chocolate.
-
Bite-Sized or Bigger: Make mini 1-inch balls for party platters, or large 2-inch treats for a heartier dessert.
-
Use a Cookie Sheet + Freezer: Speed up the setting process by placing dipped treats in the freezer for 10 minutes.
-
Add a Crunchy Twist: Mix in crushed pretzels or mini chocolate chips with the Rice Krispies.
Peanut-Free Options
-
Sunbutter or Almond Butter: Both work beautifully, though textures vary slightly.
-
Gluten-Free Cereal: Double-check cereal labels to ensure gluten-free if needed.
Serving Ideas & Occasions
These peanut butter Rice Krispie balls are perfect for:
-
Holiday cookie trays and candy platters
-
School bake sales or lunchbox treats
-
Quick weeknight desserts
-
No-bake party bites for potlucks and gatherings
They store well and are easy to transport, making them ideal for gifting — just place them in festive tins or small cupcake liners for a professional touch.
Serve with:
-
Hot chocolate or holiday coffee
-
Ice cream for an over-the-top sundae
-
A tall glass of cold milk for the ultimate nostalgic combo
Nutritional & Health Notes
Each ball is rich and satisfying, offering protein from the peanut butter and some crunch without the need for flour or baking. They’re naturally gluten-free (depending on the cereal) and can be made nut-free or vegan with simple substitutions.
Make Them Lighter:
-
Use reduced-sugar peanut butter and dark chocolate.
-
Reduce the powdered sugar slightly (you may need to increase cereal).
-
Make smaller portions for calorie-controlled bites.
Store them in the fridge for up to a week, or freeze for longer shelf life — they’re great eaten straight from the freezer for a firmer crunch.
FAQs
Q1: Can I use natural peanut butter?
A1: It’s not recommended. Natural peanut butter is too oily and won’t hold the mixture together well. Use regular creamy peanut butter for best results.
Q2: How long do these no-bake treats last?
A2: Store in an airtight container in the fridge for up to 7 days. You can also freeze them for up to 2 months — just thaw slightly before serving.
Q3: Can I skip the chocolate coating?
A3: Yes! They’re still delicious without the chocolate, but the coating adds a nice textural contrast and presentation boost.
Q4: Can I use white chocolate for dipping?
A4: Absolutely. White chocolate makes for a sweeter, creamier finish. Just be sure to melt slowly, as it can seize easily.
Q5: Do I need to refrigerate them?
A5: While you don’t have to, refrigerating helps them stay firm and hold their shape. It’s also best for storage if you’re in a warm climate.
Q6: Can I shape these into bars instead of balls?
A6: Yes! Press the mixture into a parchment-lined 8×8 pan, chill, then slice into squares before dipping or drizzling with chocolate.
Q7: Are these treats gluten-free?
A7: Rice Krispies themselves are often not certified gluten-free, so if needed, look for a GF rice cereal alternative. The rest of the ingredients can be naturally gluten-free.
PrintPeanut Butter Rice Krispie Balls – Easy No-Bake Snack

These 5-ingredient no-bake peanut butter Rice Krispie balls are chewy, crunchy, and dipped in chocolate — the perfect quick treat for holidays, parties, or everyday snacking.
- Prep Time: 15 minutes
- Cook Time: 30 minutes
- Total Time: 45 minutes
- Yield: 24 balls 1x
Ingredients
-
1 cup creamy peanut butter (not natural)
-
¼ cup unsalted butter, softened
-
1½ cups powdered sugar
-
2 cups Rice Krispies cereal
-
1½ cups semi-sweet chocolate chips or melting wafers
Instructions
-
Mix peanut butter and butter until smooth.
-
Stir in powdered sugar until combined into a thick dough.
-
Fold in Rice Krispies cereal.
-
Scoop and roll into balls. Chill for 30 minutes.
-
Melt chocolate and dip each ball. Let set on parchment.
Notes
-
Optional toppings: sprinkles, crushed nuts, or a drizzle of white chocolate.
-
Store in the fridge up to 1 week or freeze up to 2 months.
-
For a crunchier twist, add mini chocolate chips or chopped pretzels.