
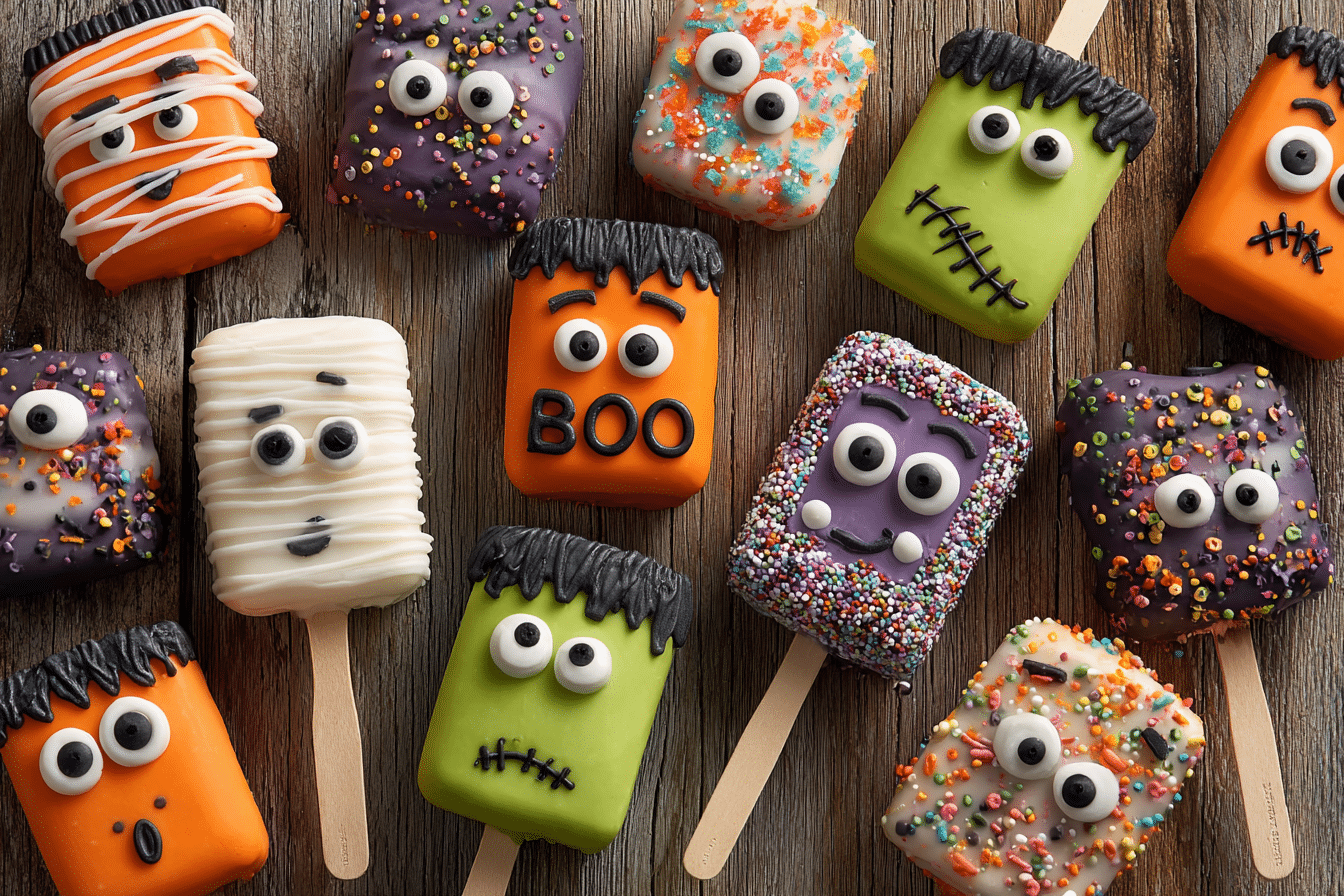
Spooky Monster Cakesicles are the ultimate no-fuss, no-scare treat for Halloween parties, school events, or a night of festive baking with the kids. Imagine moist cake mixed with frosting, shaped into popsicle-style bars, and coated in colorful chocolate—then decorated with edible eyes, jagged teeth, and silly monster expressions.
They’re cute, creepy, and surprisingly easy to make. Whether you’re aiming for ghoulish glam or cartoonish fun, cakesicles offer a creative canvas to play with textures, colors, and toppings. Best of all, they’re no-bake (if using leftover cake), handheld, and make very little mess for serving.
Let’s bring these edible monsters to life.
Ingredients Overview
Cake Base
Start with any cake flavor you like—chocolate, vanilla, red velvet, or even pumpkin spice. Use:
-
Leftover cake (homemade or store-bought)
-
Boxed cake mix for ease
-
Cupcakes or broken cake layers from a failed bake
Tip: If your cake has frosting already, skip or reduce the added frosting below.
Frosting
You’ll mix this with the cake crumbs to bind them. Go for:
-
Buttercream
-
Cream cheese frosting (pairs great with pumpkin or spice cakes)
-
Chocolate ganache (for a richer base)
Use just enough to create a playdough-like consistency that holds together without being greasy.
Candy Melts or Colored Chocolate
Use vibrantly colored candy melts or white chocolate with oil-based gel food coloring. Choose Halloween-inspired shades:
-
Purple
-
Neon green
-
Blood red
-
Black
-
Bright orange
Avoid water-based food colorings (they’ll seize the chocolate).
Decorations
-
Candy eyes (big and small)
-
Black decorating gel or melted chocolate for mouths and stitches
-
Sprinkles for texture (spikes, fur, or slime)
-
Mini marshmallows, pretzels, candy corn for arms, horns, or teeth
Cakesicle Molds
Use silicone popsicle molds with cavities about 3–4 inches long. These are reusable and easy to unmold without breakage.
Step-by-Step Instructions
1. Make the Cake Dough
-
Crumble cake into fine crumbs in a large bowl.
-
Add frosting 1 tablespoon at a time, mixing until the texture is like thick dough.
-
Roll into small logs that match your cakesicle mold size.
2. Coat the Molds
-
Melt candy melts or white chocolate until smooth.
-
Spoon a small amount into each mold and brush it around the inside using a spoon or brush.
-
Insert a popsicle stick into the slot, then chill molds in the fridge for 5–10 minutes to set the shell.
3. Fill the Molds
-
Once set, press the cake dough firmly into the molds, leaving room on top.
-
Add more melted chocolate on top and smooth flat to seal in the filling.
-
Chill again until fully set (15–20 minutes).
4. Unmold Carefully
-
Gently push from the bottom of the silicone mold to release the cakesicles.
-
Place them on a parchment-lined tray for decorating.
5. Decorate the Monsters
Get creative! Here are a few monster styles:
-
One-eyed Cyclops: Use a single large candy eye and draw a jagged mouth.
-
Frankenstein: Green shell, pretzel “bolts” on the sides, chocolate drizzle for hair.
-
Mummy: White drizzle in zigzags, with candy eyes peeking out.
-
Slime Monster: Neon green with gooey sprinkles and a big open mouth.
Use melted chocolate or decorating gel to attach decorations and create faces.
6. Let Set
-
Allow decorations to dry and chocolate to harden.
-
Store in an airtight container at room temperature (or refrigerate if your kitchen is warm).
Tips, Variations & Substitutions
-
Flavor twist: Add crushed Oreos or peanut butter to your cake mix for a monster with a surprise inside.
-
Vegan option: Use dairy-free cake, frosting, and vegan candy melts.
-
Gluten-free: Use gluten-free cake mix and frosting—texture works the same.
-
No mold? Shape by hand and dip in chocolate like traditional cake pops. Use spoon to coat evenly.
Pro tip: Use a toothpick to swirl contrasting colors into the chocolate shell before it sets for a marbled monster effect.
Serving Ideas & Occasions
Spooky Monster Cakesicles are perfect for:
-
Halloween parties and bake sales
-
Kids’ trick-or-treating treats
-
School snack boxes
-
DIY dessert tables
-
Edible gifts in treat bags with tags
Serve them upright in a foam block or lay flat on a themed platter surrounded by candy eyeballs and spooky confetti.
Nutritional & Health Notes
Each cakesicle packs around 180–250 calories, depending on the filling and chocolate coating. While they’re definitely an indulgent treat, they offer built-in portion control.
To make them a little lighter:
-
Use reduced-sugar cake or frosting
-
Skip excessive candy coating
-
Use fruit-based fillings (like mashed banana or date paste for kids)
They’re also easy to adapt for allergies and dietary needs with the right substitutions.
FAQs
Q1: How far in advance can I make cakesicles?
You can make and decorate them up to 3 days in advance. Store in an airtight container at cool room temperature or refrigerate if needed. Bring to room temp before serving.
Q2: Why is my chocolate shell cracking?
This usually happens when the filling is too cold or pressed in too firmly. Let the coating set gently, and don’t overstuff the mold. Warm the molds slightly if needed before unmolding.
Q3: Can I use candy bars or cookies instead of cake?
Absolutely. Crushed cookies like Oreos or crumbled brownies mixed with frosting work just as well. It’s a great way to use up leftover sweets.
Q4: Can I make them without a mold?
Yes. Shape the cake mixture into bars by hand and dip in melted chocolate, using a spoon to coat. Freeze slightly before dipping for best results.
Q5: Can kids help make these?
Yes! Kids love stuffing and decorating the cakesicles. Prepare the chocolate coating yourself (as it can be hot), and let little hands handle the filling and candy eyes.
Q6: How do I transport them for a party?
Place each cakesicle in a mini cellophane bag and tie with ribbon. Or pack flat in a box with dividers and parchment paper between layers to avoid smudging.
Q7: Can I freeze cakesicles?
Yes, freeze uncoated or fully made cakesicles for up to 1 month. Wrap tightly and thaw in the fridge overnight before serving. Avoid condensation by keeping them wrapped while thawing.
PrintSpooky Monster Cakesicles for Halloween Parties
Fun and frightfully cute no-bake cakesicles made with cake and frosting, coated in chocolate, and decorated to look like spooky Halloween monsters.
- Prep Time: 30 minutes
- Cook Time: 30 minutes
- Total Time: 1 hour
- Yield: 8–10 cakesicles 1x
Ingredients
-
2 cups crumbled cake (any flavor)
-
1/3–1/2 cup frosting
-
2 cups candy melts or white chocolate (colored)
-
Candy eyes, sprinkles, decorating gel, pretzels, etc.
-
Cakesicle molds & popsicle sticks
Instructions
-
Mix cake crumbs and frosting into a moldable dough.
-
Coat molds with melted candy melts and chill.
-
Press cake mixture into molds, insert stick, and cover with chocolate.
-
Chill again until firm, then unmold.
-
Decorate with candy eyes, chocolate drizzle, and sprinkles.
-
Let set and serve.
Notes
Use any flavor combo you like. Store at room temp for 2–3 days or refrigerate longer.