
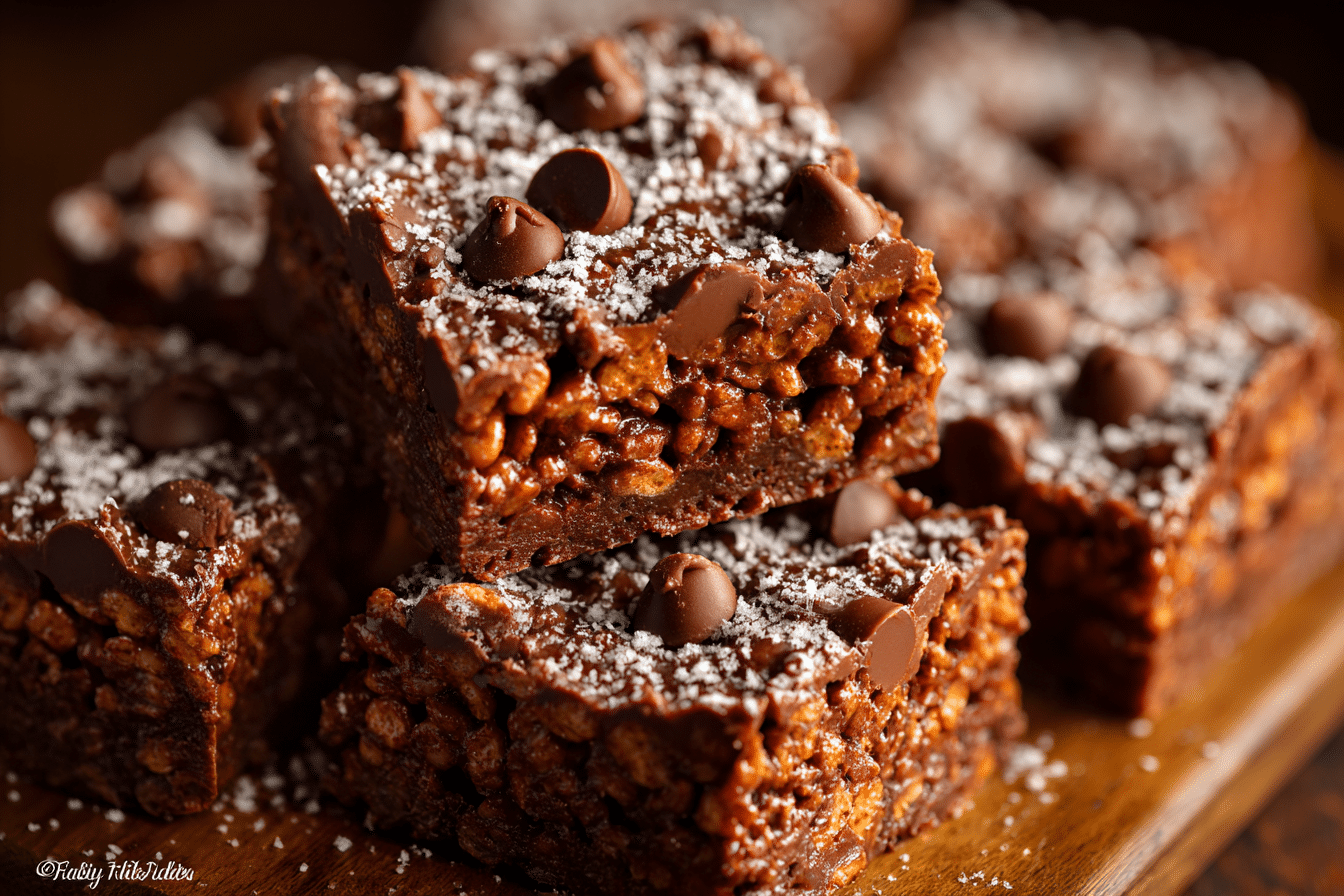
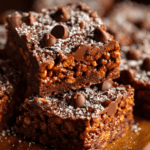
This Easy Muddy Buddy Rice Krispies recipe is the ultimate mash-up of two childhood favorites: the classic marshmallowy Rice Krispies treat and the chocolate-peanut butter-coated crunch of Muddy Buddies (also known as Puppy Chow). With no baking required, this quick snack comes together in just minutes and is perfect for holidays, parties, or after-school munching.
Imagine crispy cereal squares coated in melty chocolate, creamy peanut butter, and a dusting of powdered sugar, all with the nostalgic pull of gooey marshmallows hiding inside. These treats are chewy, crunchy, and sweet all at once—and dangerously addictive.
Whether you’re whipping up something for a bake sale, packing lunchbox surprises, or just want a cozy treat without turning on the oven, this recipe is a deliciously easy win.
Ingredients Overview
This recipe uses pantry-friendly staples and combines the textures of traditional Rice Krispies treats with the flavor profile of Muddy Buddies. Here’s a closer look at what you’ll need:
Main Ingredients:
-
Rice Krispies Cereal: The base of the treat, offering that classic light crunch. Use the name brand or a crispy rice cereal equivalent.
-
Mini Marshmallows: These get melted into the base for chewy binding. Reserve a handful to fold in at the end for soft pockets of sweetness.
-
Butter: Adds richness and helps melt the marshmallows smoothly.
-
Creamy Peanut Butter: Provides body, flavor, and that signature Muddy Buddy taste.
-
Semi-Sweet Chocolate Chips: The key chocolatey layer. Dark or milk chocolate also works depending on sweetness preference.
-
Vanilla Extract: Adds a warm depth to the flavor blend.
-
Powdered Sugar: The final coating that gives Muddy Buddies their signature snowy finish.
Optional Add-Ins:
-
Mini M&Ms or chocolate candies: For color and extra chocolate crunch.
-
Chopped peanuts: Adds texture and a salty contrast.
-
Sea Salt: A pinch on top can enhance flavor complexity.
Ingredient Tips & Substitutions:
-
Allergy-Friendly: Use sunflower seed butter instead of peanut butter for a nut-free version.
-
Vegan Option: Choose vegan marshmallows, dairy-free chocolate chips, and plant-based butter.
-
Extra Crunch: Add a handful of crushed pretzels or cornflakes to the mix for variety.
Stick with creamy—not crunchy—peanut butter to avoid crumbly texture. The goal is smooth, melty, and blendable.
Step-by-Step Instructions
Step 1: Prep the Pan
-
Line an 8×8 or 9×9 inch baking dish with parchment paper or lightly grease with butter or cooking spray.
-
Set aside 1 cup of mini marshmallows to fold in later (optional).
Step 2: Make the Marshmallow Base
-
In a large saucepan, melt ¼ cup (½ stick) of butter over low heat.
-
Add 4 cups of mini marshmallows and stir until completely melted and smooth.
-
Turn off the heat and stir in ½ teaspoon vanilla extract.
-
Quickly mix in ½ cup peanut butter until well incorporated.
The mixture should be glossy, thick, and fragrant.
Step 3: Stir in the Cereal
-
Add 5 cups of Rice Krispies cereal to the marshmallow mixture and stir to coat evenly.
-
Fold in the reserved 1 cup mini marshmallows for extra gooey bites (optional).
-
Gently press the mixture into the prepared pan. Don’t compact it too firmly—just enough to even it out.
Tip: Lightly butter your hands or spatula to prevent sticking while pressing.
Step 4: Prepare the Chocolate Coating
-
In a microwave-safe bowl, combine 1 cup semi-sweet chocolate chips and ¼ cup peanut butter.
-
Microwave in 20-second intervals, stirring between each, until smooth (about 60–90 seconds total).
-
Pour the chocolate mixture over the cereal base and spread evenly with a spatula.
Let it sit for 5 minutes before moving to the next step.
Step 5: Powdered Sugar Finish
-
Once the chocolate is slightly set but still tacky, sprinkle ¾ to 1 cup powdered sugar over the top.
-
Gently tap the pan or use a mesh sifter to distribute the sugar evenly.
Optional: Chill for 20–30 minutes to firm everything up, then cut into squares or bars.
Tips, Variations & Substitutions
-
Double the batch: Use a 9×13-inch pan and double all ingredients.
-
Mix it up: Try swapping Rice Krispies with Chex cereal for a more traditional Muddy Buddy crunch.
-
Add-ins galore: Mini chocolate chips, sprinkles, or even crushed toffee bits can be folded in before pressing into the pan.
-
Holiday variation: Use red and green candies or sprinkles for a festive twist.
-
Want more crunch? Stir in pretzel sticks or cornflakes along with the cereal.
Serving Ideas & Occasions
These no-bake bars are perfect for:
-
Holiday cookie swaps or snack platters
-
Lunchboxes or after-school treats
-
Movie night snacks
-
Party favors or potluck desserts
Cut them into small squares for bite-sized treats, or into bars for hearty snack portions. Serve chilled or at room temperature—they’ll stay firm and chewy either way.
Pair with a glass of milk or hot cocoa for a nostalgic treat, or wrap in parchment and tie with string for gifting.
Nutritional & Health Notes
Each bar is a mix of carbs, sugars, and fats—meant to be a treat in moderation. A typical square contains approximately 150–200 calories depending on size and toppings.
To lighten the recipe:
-
Use less peanut butter in the base or topping.
-
Choose dark chocolate chips (70% cocoa) for reduced sugar.
-
Cut smaller pieces and serve on a snack tray with fruit or nuts.
While not a “health” food, these bars offer portion control and are made with simple, recognizable ingredients. They’re also naturally egg-free, making them a good option for those with common allergies.
FAQs
Q1: Can I make these ahead of time?
Yes! Store them in an airtight container at room temperature for up to 5 days, or refrigerate for firmer texture. They also freeze well—wrap tightly and freeze up to 1 month.
Q2: Can I use chunky peanut butter?
You can, but it may make the mixture harder to stir and the texture a bit crumbly. Stick to creamy for smoother results.
Q3: Why is my chocolate topping separating?
Make sure the chocolate and peanut butter are melted gently and stirred well. Overheating can cause the oils to separate.
Q4: Do I need to refrigerate them to set?
No, but chilling helps them slice more cleanly and hold their shape better, especially in warm climates.
Q5: Can I use almond or sunflower butter instead?
Absolutely. Any creamy nut or seed butter works well—just be sure it’s not too oily or runny.
Q6: What size should I cut the bars?
For parties, cut into 1-inch squares. For snacks or lunchboxes, 2×2-inch bars are perfect. You can also shape them into small balls before chilling for a fun variation.
Q7: Are these gluten-free?
If using gluten-free rice cereal and checking your marshmallows and chocolate chips for gluten-safe labeling, yes—they can be made gluten-free.
PrintMuddy Buddy Rice Krispie Treats with Chocolate & Peanut Butter
These Easy Muddy Buddy Rice Krispies bars combine chewy marshmallow cereal with chocolate, peanut butter, and powdered sugar for a no-bake treat that’s irresistibly crunchy and sweet.
- Prep Time: 15 minutes
- Cook Time: 20 minutes (optional)
- Total Time: 35 minutes
- Yield: 12–16 bars 1x
Ingredients
-
¼ cup unsalted butter
-
4 cups mini marshmallows (plus 1 cup reserved, optional)
-
½ tsp vanilla extract
-
½ cup creamy peanut butter
-
5 cups Rice Krispies cereal
-
1 cup semi-sweet chocolate chips
-
¼ cup peanut butter (for topping)
-
¾–1 cup powdered sugar
Instructions
-
Line an 8×8 pan with parchment paper.
-
Melt butter in a large pot over low heat. Stir in 4 cups marshmallows and melt fully.
-
Add vanilla and ½ cup peanut butter. Stir until smooth.
-
Mix in Rice Krispies and optional 1 cup marshmallows. Press into pan gently.
-
In a microwave-safe bowl, melt chocolate chips and ¼ cup peanut butter together until smooth.
-
Spread chocolate over the cereal base. Let sit 5 minutes.
-
Sprinkle powdered sugar evenly over the top.
-
Chill 20–30 minutes if desired, then cut into squares.
Notes
-
Store at room temp up to 5 days or refrigerate for a firmer bar.
-
Add sprinkles, candies, or chopped nuts for variety.
-
Freeze in airtight containers for up to 1 month.