
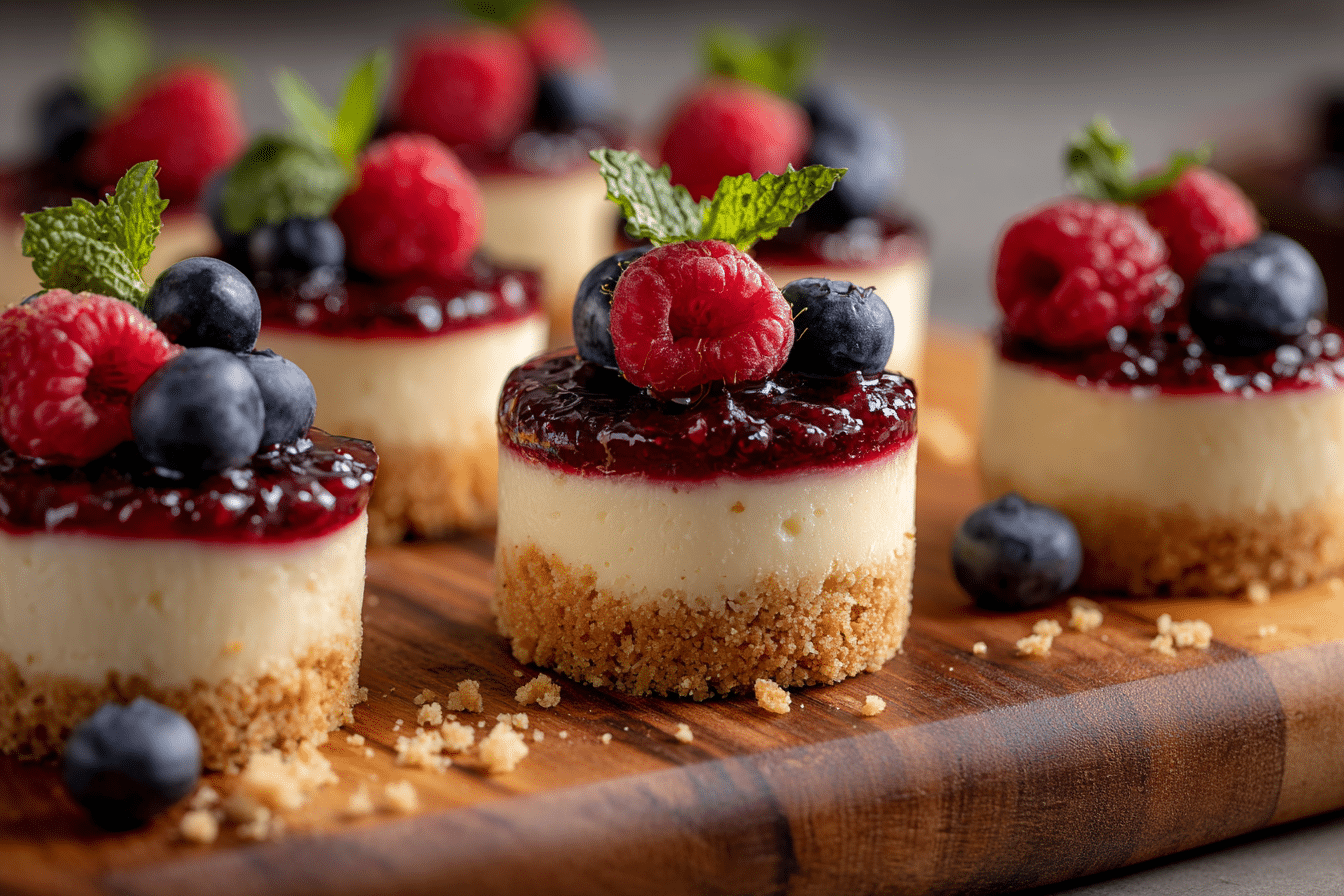
Few desserts deliver joy as effortlessly as Easy Mini Cheesecakes. Bite-sized, rich, and endlessly customizable, these little gems are ideal for parties, holidays, or anytime your sweet tooth demands something creamy and satisfying—without the fuss of a full cheesecake.
Made in a muffin tin with a buttery graham cracker crust and a smooth, velvety filling, these mini cheesecakes bake in a fraction of the time and cool much faster than their full-sized counterpart. The texture is dense yet creamy, with just the right balance of tangy cream cheese and sweet vanilla.
You can dress them up with fresh fruit, jam, chocolate ganache, or crushed cookies—or serve them plain and let that silky filling shine. Whether you’re baking for a crowd or prepping individual desserts for the week, these easy mini cheesecakes are the kind of recipe you’ll reach for again and again.
Ingredients Overview
Each component of this recipe is simple and straightforward, yet essential to delivering that classic cheesecake flavor and texture in miniature form.
Graham Cracker Crumbs: These form the base of the crust. The fine, crumbly texture makes for a buttery, slightly crunchy foundation that contrasts beautifully with the smooth filling. You can substitute digestive biscuits or vanilla wafers if desired.
Butter: Melted unsalted butter binds the crumbs and helps the crust crisp up in the oven. Salted butter can be used, but omit any additional salt from the crust mixture.
Granulated Sugar: Just a touch sweetens both the crust and the filling. You can use light brown sugar in the crust for a more caramelized flavor.
Cream Cheese: The star of the show. Full-fat cream cheese at room temperature blends smoothly and gives the filling its rich, creamy base. Avoid low-fat varieties for best texture.
Eggs: Provide structure to the filling, helping it set into that dense, velvety texture that cheesecake lovers crave.
Vanilla Extract: Adds warm flavor and depth to the filling. Pure vanilla is preferred, but imitation works in a pinch.
Sour Cream: Optional, but adds a subtle tang and extra creaminess. Greek yogurt can be used as a substitute.
Toppings (Optional): Fresh berries, whipped cream, fruit preserves, caramel, chocolate sauce, or even crushed candy. These allow you to personalize each cheesecake to suit different tastes.
Step-by-Step Instructions
-
Preheat and Prepare:
Preheat your oven to 325°F (165°C). Line a standard 12-cup muffin tin with paper liners. This helps with easy removal and adds a nice presentation. -
Make the Crust:
In a bowl, combine 1 cup graham cracker crumbs, 2 tablespoons sugar, and 3 tablespoons melted butter. Stir until the crumbs are evenly moistened.
Divide the mixture evenly among the liners (about 1 tablespoon each) and press down firmly using the bottom of a small glass or spoon.
Bake the crusts for 5 minutes, then remove and let cool slightly. -
Prepare the Filling:
Using a hand mixer or stand mixer, beat 16 oz of softened cream cheese until smooth and creamy, about 2 minutes.
Add ½ cup sugar, 1 tsp vanilla extract, and 2 large eggs, one at a time, mixing on low speed until just combined. Do not overmix.
If using, fold in ¼ cup sour cream for a creamier texture. -
Fill the Cups:
Spoon the cheesecake batter evenly into the muffin cups, filling each about ¾ full. Tap the pan gently on the counter to release any air bubbles. -
Bake:
Bake for 16–18 minutes, or until the centers are just set and slightly jiggly. The tops should look matte, not shiny.
Turn off the oven, crack the door, and let the cheesecakes rest inside for 10 minutes to prevent cracking. -
Chill:
Cool completely at room temperature, then refrigerate for at least 2 hours (or overnight) before adding toppings and serving.
Tips, Variations & Substitutions
Don’t Overmix:
Overbeating the batter can incorporate too much air, which leads to cracking. Mix until just smooth for best results.
Make Ahead:
These cheesecakes are ideal for making ahead. Store in the fridge for up to 5 days or freeze for up to 2 months (without toppings). Thaw overnight in the refrigerator.
Mini Crust Variations:
Try Oreo cookie crumbs, gingersnaps, or even pretzels for a salty-sweet twist. A chocolate wafer crust pairs well with fruit toppings.
Flavor Boosters:
Add a teaspoon of lemon zest to the filling for brightness, or swirl in a teaspoon of raspberry jam before baking for a fruity surprise.
Topping Ideas:
Drizzle with caramel and sprinkle with sea salt, spoon cherry pie filling on top, or add a thin layer of chocolate ganache and a dollop of whipped cream.
Dairy-Free Adaptation:
Use dairy-free cream cheese alternatives and plant-based yogurt or sour cream. Substitute coconut oil for butter in the crust.
Serving Ideas & Occasions
Mini cheesecakes are perfect for entertaining. They’re easy to serve, mess-free, and always a hit at potlucks, showers, birthdays, or holidays.
Serve them plain for a classic presentation, or set up a “cheesecake bar” where guests can top their own with fruit, sauces, or nuts. This makes them interactive and fun for gatherings.
They’re also great for portion control—each cheesecake is rich enough to satisfy but small enough to enjoy without overindulgence. Perfect for lunchboxes, after-dinner treats, or just a little moment of joy during the day.
For a touch of elegance, plate them with a swipe of coulis, a mint leaf, or a light dusting of powdered sugar.
Nutritional & Health Notes
Each mini cheesecake contains around 200–250 calories, depending on the crust and toppings. They’re high in fat due to the cream cheese and butter, but also provide small amounts of protein and calcium.
Using reduced-fat cream cheese or low-sugar toppings can lighten them up. Swapping in Greek yogurt for sour cream adds a bit more protein and reduces fat slightly.
While they’re not exactly health food, mini cheesecakes can be enjoyed as part of a balanced approach to sweets—especially since they’re portioned individually.
If you’re avoiding gluten, opt for gluten-free graham crackers in the crust.
FAQs
Can I make mini cheesecakes without liners?
Yes, but use a nonstick pan and grease it well. Liners help with easy removal and make the presentation neater.
Why did my cheesecakes crack?
Overbaking or overmixing are the usual culprits. Pull them from the oven while still slightly jiggly in the center, and let them cool gradually.
How long do they keep in the fridge?
They’ll last up to 5 days in an airtight container. Add toppings just before serving to keep them fresh.
Can I freeze mini cheesecakes?
Absolutely. Freeze without toppings, wrapped individually. Thaw overnight in the fridge and top before serving.
Can I use a different crust base?
Yes! Crushed Oreos, chocolate wafers, shortbread, or even a gluten-free cookie base all work wonderfully.
What if I don’t have sour cream?
You can skip it or substitute plain Greek yogurt for a similar tang and creaminess.
Can I make these in mini muffin tins?
Yes, just reduce baking time to 10–12 minutes. Keep an eye on them, as smaller portions cook faster.
Cheesecake Minis with Berry Topping (So Easy)
These Easy Mini Cheesecakes are creamy, rich, and simple to make in a muffin tin. Perfect for parties or everyday treats, they’re ready in under 30 minutes and endlessly customizable.
- Prep Time: 10 minutes
- Cook Time: 18 minutes
- Total Time: 2 hours 30 minutes
- Yield: 12 mini cheesecakes
Ingredients
For the crust:
1 cup graham cracker crumbs
2 tbsp sugar
3 tbsp unsalted butter, melted
For the filling:
16 oz cream cheese, softened
½ cup granulated sugar
2 large eggs
1 tsp vanilla extract
¼ cup sour cream (optional)
Instructions
-
Preheat oven to 325°F. Line a 12-cup muffin tin with paper liners.
-
Mix graham crumbs, sugar, and melted butter. Press 1 tbsp into each liner. Bake 5 minutes.
-
Beat cream cheese until smooth. Add sugar, vanilla, and eggs one at a time. Mix gently. Stir in sour cream if using.
-
Divide batter among cups, filling ¾ full. Tap to release air bubbles.
-
Bake 16–18 minutes, until centers are set but slightly jiggly. Cool in oven 10 minutes with door ajar.
-
Chill at least 2 hours before adding toppings and serving.
Notes
Customize with fruit, chocolate, or jam toppings. Freeze without toppings for up to 2 months.