
Peanut butter Rice Krispie treats are a nostalgic, no-fuss dessert that blends crispy, chewy, and creamy textures in one irresistible bite. These classic no-bake bars take the traditional marshmallow treat to the next level with the nutty richness of peanut butter — and they’re ready in just 15 minutes.
Whether you’re making them for after-school snacks, bake sales, or late-night cravings, these bars deliver the perfect balance of crunch and chew. They’re simple enough for beginner cooks, but satisfying enough for any sweet tooth.
With just a few pantry staples, you’ll have a batch of crowd-pleasing treats that keep well and can be dressed up with chocolate, sea salt, or other favorite toppings.
Ingredients Overview
Peanut butter Rice Krispie treats require only a handful of ingredients, but each plays a key role in texture and flavor:
1. Rice Krispies (Crispy Rice Cereal)
-
This forms the signature base. Use fresh, crisp cereal for the best snap.
-
Gluten-free tip: Be sure to use certified gluten-free cereal, as some contain malt flavoring derived from barley.
2. Mini Marshmallows
-
They melt smoothly and bind the bars together with a chewy, sweet pull.
-
Mini marshmallows melt faster and more evenly than large ones.
-
Marshmallow tip: Use fresh ones — stale marshmallows don’t melt properly.
3. Creamy Peanut Butter
-
Adds nutty flavor and richness. Smooth peanut butter blends best into the warm marshmallow mixture.
-
Natural PB note: If using natural peanut butter, stir it well and expect a slightly softer texture.
4. Unsalted Butter
-
Creates a smooth, glossy mixture and adds buttery flavor. Salted butter is fine too — just reduce any added salt elsewhere.
5. Vanilla Extract (optional)
-
A small amount enhances the flavor and rounds out the sweetness.
Optional Toppings:
-
Melted chocolate drizzle
-
Sprinkle of flaky sea salt
-
Chopped peanuts
-
Reese’s Pieces or mini M&Ms
Step-by-Step Instructions
Follow these steps for perfect peanut butter Rice Krispie treats every time:
Step 1: Prepare the pan
-
Lightly grease a 9×13-inch baking dish with butter or nonstick spray. You can also line it with parchment for easy lifting.
Step 2: Melt the base
-
In a large pot over low heat, melt ¼ cup unsalted butter.
-
Add 10 oz mini marshmallows (about 5½ cups) and stir until melted and smooth.
-
Turn off the heat and immediately stir in ½ cup creamy peanut butter and 1 tsp vanilla extract (if using) until fully combined.
Step 3: Add the cereal
-
Gently fold in 6 cups of Rice Krispies cereal.
-
Stir quickly and carefully to coat all the cereal before the mixture starts to firm up.
Step 4: Press into the pan
-
Transfer the mixture into the prepared pan.
-
Lightly grease your hands or a spatula and press the mixture down gently and evenly. Don’t press too hard — that can make the bars too dense.
Step 5: Cool and cut
-
Let the treats set at room temperature for about 30 minutes.
-
Cut into squares or rectangles and enjoy!
Tips, Variations & Substitutions
-
Don’t overheat: Keep the marshmallow mixture on low heat to avoid hard, tough bars.
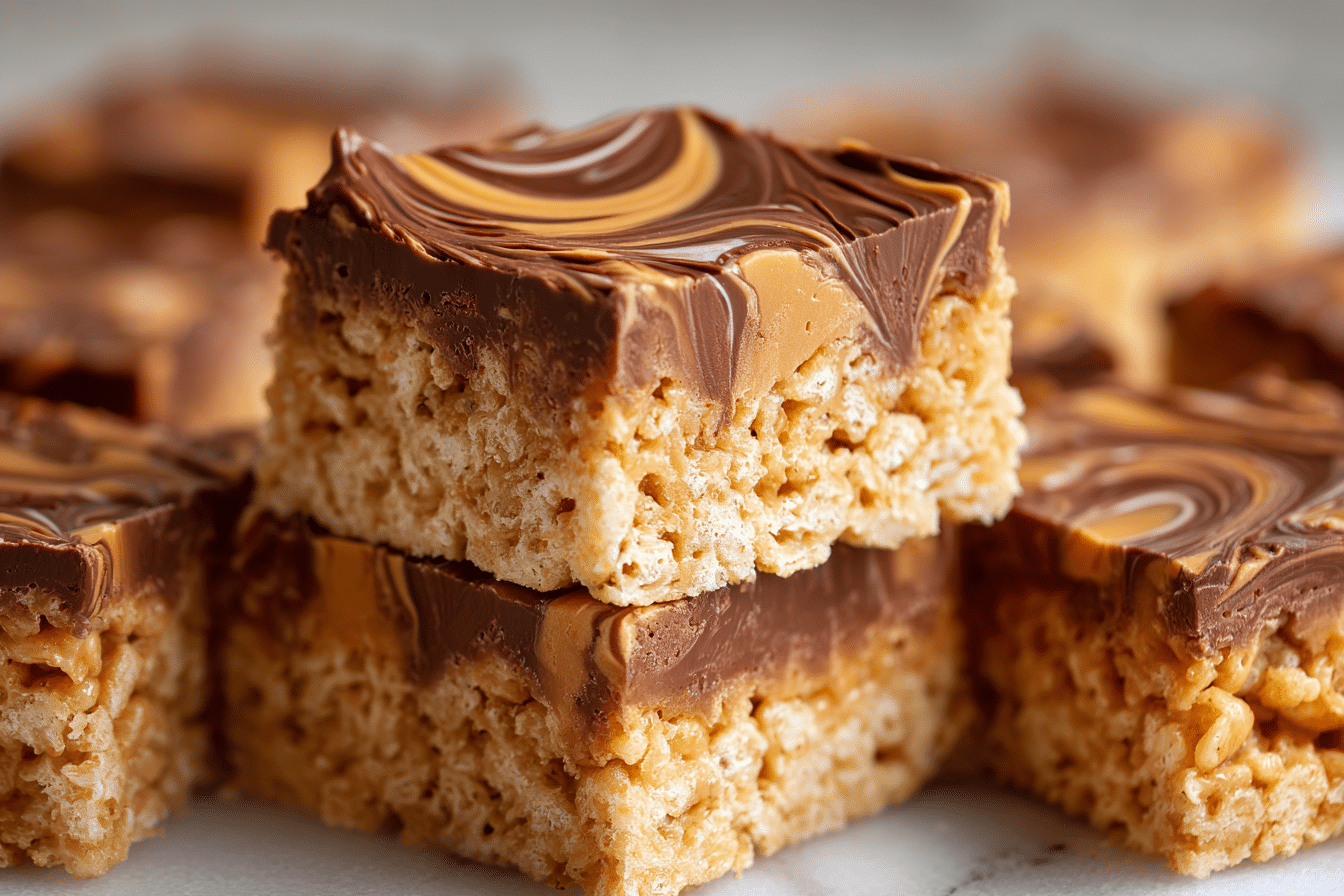
-
Chocolate-topped version: Melt 1 cup of chocolate chips with 1 tbsp peanut butter and spread over the cooled bars. Let set before cutting.
-
Add crunch: Mix in ½ cup chopped peanuts or toffee bits for texture.
-
Marshmallow swirl: Reserve ½ cup of mini marshmallows and fold them in with the cereal for pockets of gooey texture.
-
Allergy-friendly option: Use sunflower seed butter or almond butter if needed.
Serving Ideas & Occasions
Peanut butter Rice Krispie treats are perfect for:
-
Lunchbox snacks: Wrap individually for grab-and-go treats.
-
Potlucks and bake sales: Always a hit and easy to transport.
-
Birthday party platters: Slice into fun shapes or drizzle with colored chocolate.
-
After-school snacks: Quick to make and kid-approved.
-
Picnic desserts: No need for refrigeration or utensils.
Their chewy, crunchy texture makes them hard to resist and easy to love.
Nutritional & Health Notes
While peanut butter Rice Krispie treats are certainly a dessert, they offer a slightly more satisfying twist than the original thanks to the peanut butter:
-
Peanut butter adds protein and healthy fats, giving each bite more staying power.
-
Marshmallows and cereal keep things light and airy without feeling too rich.
To make them a bit lighter:
-
Reduce marshmallows to 8 oz for a slightly firmer treat.
-
Use natural peanut butter with no added sugar.
-
Cut into small squares for portion-controlled bites.
Each bar (from a 9×13 pan cut into 20 pieces) contains roughly 140–160 calories.
FAQs
Q1: Can I use natural peanut butter?
A1: Yes, but make sure it’s well-stirred and not too oily. Natural PB tends to yield softer, slightly looser bars, but still works well.
Q2: Can I make these ahead of time?
A2: Absolutely. They keep well for up to 5 days at room temperature in an airtight container. For best texture, avoid refrigerating.
Q3: How do I keep them from sticking to the pan?
A3: Grease the pan with butter or line it with parchment paper. You can also lightly butter your hands or spatula for easier pressing.
Q4: Can I add chocolate?
A4: Yes! Either stir in mini chocolate chips (wait until the mixture cools slightly so they don’t melt) or spread a chocolate-peanut butter layer on top.
Q5: Can I freeze Rice Krispie treats?
A5: Yes, but they’re best fresh. To freeze, wrap tightly in plastic wrap and store in a freezer-safe container for up to 1 month. Thaw at room temp before serving.
Q6: What cereal brands work best?
A6: Classic Rice Krispies or store-brand puffed rice cereal both work well. Just make sure they’re fresh and crisp.
Q7: Why are my treats too hard?
A7: Overheating the marshmallows or pressing the mixture too firmly into the pan can result in hard bars. Always use low heat and a gentle hand.
Classic Peanut Butter Rice Krispie Treats with Chocolate

These classic no-bake peanut butter Rice Krispie treats are chewy, crunchy, and full of nutty flavor — perfect for snacks, parties, or quick desserts.
- Prep Time: 10 minutes
- Cook Time: 5 minutes
- Total Time: 20 minutes
- Yield: 20 bars 1x
Ingredients
-
6 cups Rice Krispies cereal
-
10 oz mini marshmallows (about 5½ cups)
-
¼ cup unsalted butter
-
½ cup creamy peanut butter
-
1 tsp vanilla extract (optional)
Instructions
-
Grease a 9×13-inch pan or line with parchment.
-
In a large pot, melt butter over low heat. Add marshmallows and stir until melted.
-
Remove from heat and stir in peanut butter and vanilla.
-
Quickly fold in the cereal until fully coated.
-
Press into pan gently with greased hands or spatula.
-
Let cool 30 minutes, then cut into bars.
Notes
Add chocolate drizzle or stir in chopped peanuts for extra flavor. Store in an airtight container for up to 5 days.