
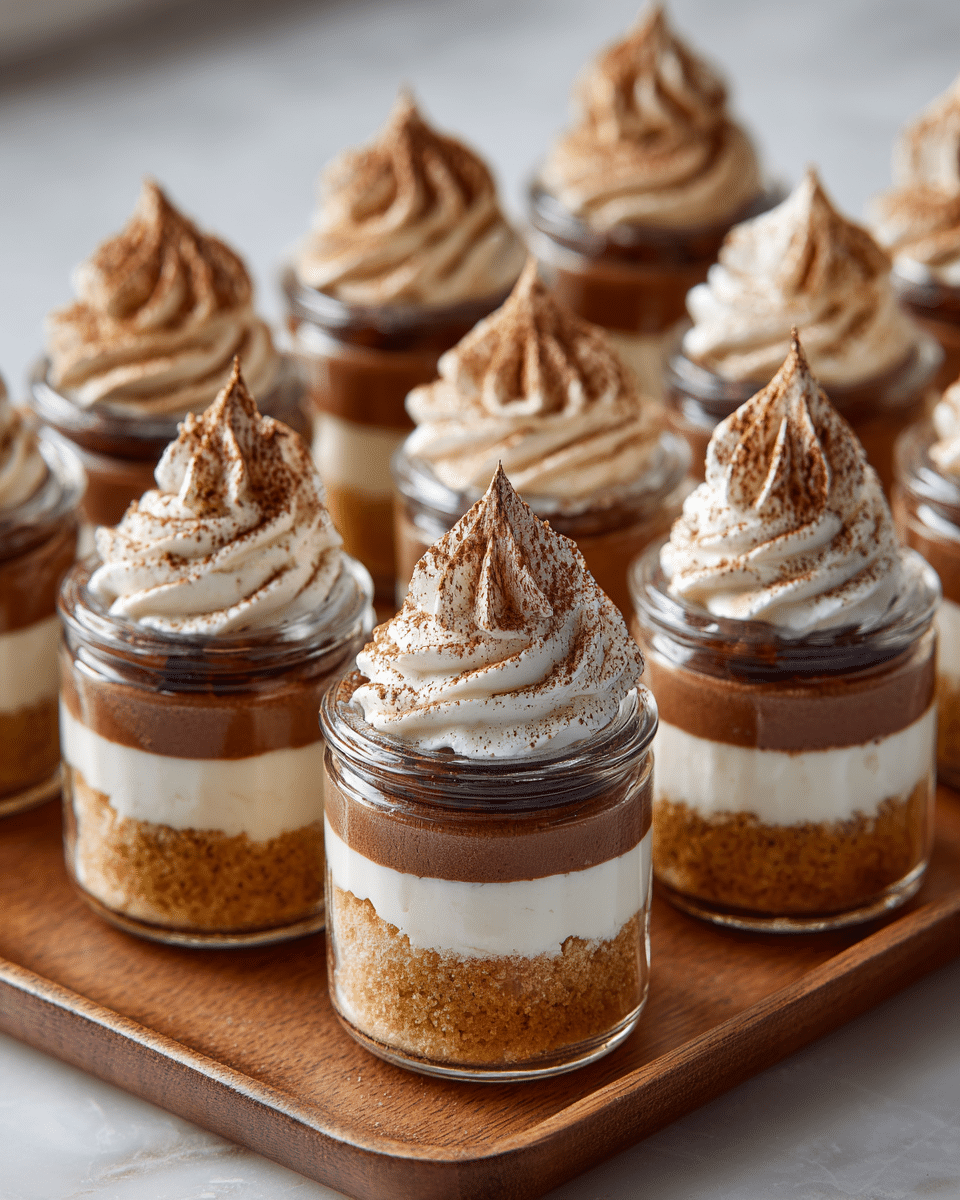
Mini Tiramisu Cups offer a delightful twist on the classic Italian dessert, transforming a beloved treat into individual, party-ready portions. With layers of creamy mascarpone, espresso-soaked ladyfingers, and a dusting of cocoa, these elegant cups are perfect for entertaining or indulging solo. Their no-bake nature and quick assembly make them a reliable go-to for holidays, dinner parties, or weekday cravings when time is short but flavor is non-negotiable.
A Classic Italian Dessert, Miniaturized
Tiramisu, which means “pick me up” in Italian, has been gracing dessert tables since it first appeared in Veneto in the 1960s. Traditionally made in a large dish and sliced into squares, this layered dessert has become an international favorite for its delicate balance of bold espresso, creamy mascarpone, and rich cocoa. The mini version preserves all the elegance and indulgence but adds modern convenience. Served in small cups or jars, they’re perfect for portion control, easy storage, and mess-free entertaining.
These individual tiramisu cups don’t just look beautiful—they embody the essence of Italian comfort and sophistication in a compact form. They’re a dream for hosts (no slicing, no plating), and ideal for guests who want to sample more than one dessert. Plus, the no-bake method means you can whip them up without turning on the oven. Whether it’s a dinner party, bridal shower, or a self-care night, these mini tiramisu cups feel just right.
Ingredients Overview: What You Need and Why It Matters
Each layer of tiramisu plays a crucial role, and using the right ingredients ensures the final result is balanced, creamy, and deeply flavorful.
Ladyfingers (Savoiardi)
These light, crisp sponge biscuits soak up espresso quickly while holding their shape. Their slightly sweet and dry texture becomes cake-like when layered in cream.
Espresso or Strong Coffee
The bold coffee flavor is essential in tiramisu. Use high-quality espresso or a dark roast brewed coffee. Let it cool before dipping the ladyfingers. You can spike it with coffee liqueur or dark rum for added depth.
Mascarpone Cheese
Mascarpone is a soft Italian cheese that gives tiramisu its signature creamy texture. It’s rich yet mild, making it the perfect base to balance the bitter espresso and sweet cream.
Heavy Cream
Whipped cream adds lightness and volume to the mascarpone mixture. For best results, use cold heavy cream with a fat content of at least 36%.
Egg Yolks (optional but traditional)
In classic tiramisu, egg yolks are whipped with sugar to form a zabaglione. This step creates a richer custard-like flavor but can be omitted if you’re concerned about raw eggs or want a quicker prep.
Granulated Sugar
Used to sweeten the mascarpone cream mixture. Don’t overdo it—tiramisu should be subtly sweet, not overpowering.
Vanilla Extract
A dash of vanilla rounds out the cream layer and enhances the flavor of the mascarpone and cream.
Unsweetened Cocoa Powder
A dusting of cocoa powder is the final touch that adds a bitter note and aesthetic flair. Choose Dutch-process cocoa for a smoother taste and darker color.
Optional Add-Ins:
-
Coffee Liqueur (like Kahlúa): For grown-up depth
-
Dark Rum or Marsala Wine: Traditional Italian flavoring options
-
Chocolate Shavings: Add texture and richness
Step-by-Step Instructions: How to Build the Perfect Mini Tiramisu Cups
Making mini tiramisu cups is more about layering and technique than baking. Here’s how to achieve perfect results every time.
1. Prepare the Espresso Base
Brew your espresso or strong coffee and let it cool to room temperature. Stir in your chosen liqueur (optional). Pour into a shallow bowl wide enough for dipping ladyfingers.
2. Whip the Cream
Using a hand mixer or stand mixer, whip the cold heavy cream to stiff peaks. This should take about 2–3 minutes on medium-high speed. Set aside.
3. Make the Mascarpone Mixture
In another bowl, combine mascarpone cheese, granulated sugar, and vanilla extract. If using egg yolks, whisk them with sugar over a double boiler until pale and thick before folding into the mascarpone. Mix until smooth and creamy.
4. Combine Cream and Mascarpone
Gently fold the whipped cream into the mascarpone mixture in batches. Use a spatula to maintain the airy texture. The result should be light, thick, and spreadable.
5. Dip and Layer the Ladyfingers
Break ladyfingers in half if necessary to fit your cups. Dip each piece briefly (1–2 seconds) into the coffee mixture—don’t oversoak, or they’ll turn mushy. Place a layer of dipped ladyfingers into each serving cup.
6. Add Cream Layers
Spoon or pipe a generous layer of the mascarpone cream over the ladyfingers. Use a piping bag for a neater presentation, especially in clear glasses.
7. Repeat Layers
Repeat with another layer of dipped ladyfingers and top with more mascarpone cream.
8. Chill
Cover the cups with plastic wrap and refrigerate for at least 4 hours, preferably overnight. This allows flavors to meld and the cream to firm up.
9. Finish with Cocoa
Just before serving, dust each cup with unsweetened cocoa powder using a fine-mesh sieve. Add optional chocolate shavings or espresso beans for garnish.
Tips, Variations, and Substitutions
Pro Tips for Success
-
Use cold ingredients for best texture.
-
Don’t oversoak the ladyfingers—a quick dip is all you need.
-
Let the dessert chill thoroughly. The texture improves significantly after several hours in the fridge.
Flavor Variations
-
Chocolate Tiramisu: Add a layer of chocolate ganache between the cream and cookies.
-
Berry Tiramisu: Substitute the espresso for berry syrup and add fresh raspberries or strawberries.
-
Matcha Tiramisu: Replace coffee with matcha tea for a Japanese-inspired take.
Dietary Swaps
-
Egg-free: Skip the yolks entirely; the cream-mascarpone mixture is still rich and silky.
-
Alcohol-free: Use pure espresso without any liqueur.
-
Dairy-free: Try dairy-free whipped topping and vegan cream cheese alternatives, though texture may vary.
Serving Ideas & Occasions
Mini tiramisu cups shine in any setting, from casual to formal:
-
Holiday Gatherings: Perfect for Thanksgiving, Christmas, or Easter buffets.
-
Dinner Parties: Elegant and easy to serve—no slicing needed.
-
Weddings or Showers: Chic and individually portioned for ease.
-
Weeknight Treats: Assemble ahead for a fancy finish to a simple meal.
-
Meal Prep: Store in the fridge for up to 4 days—ideal for a ready-made dessert fix.
Their layered look is especially impressive in clear glasses or mini mason jars, making them both functional and decorative.
Nutritional & Health Notes
Tiramisu is a treat, but it has some nutritional highlights when enjoyed in moderation.
What’s Inside:
-
Protein: Mascarpone and cream provide a modest amount.
-
Calcium: Present in the dairy ingredients.
-
Caffeine: From the espresso, adding a small energy boost.
Keep in Mind:
-
Tiramisu is high in fat and sugar, so small portions are ideal.
-
Using lower-fat mascarpone or reduced sugar can slightly reduce the calorie load.
-
Skip the alcohol to make it more family-friendly and lighter.
A mini serving delivers all the flavor and satisfaction of traditional tiramisu, without the overindulgence of a giant slice.
FAQ: Mini Tiramisu Cups
1. Can I make mini tiramisu cups ahead of time?
Yes, they’re best when made ahead! Preparing them 12–24 hours in advance gives the flavors time to blend and the layers to set beautifully.
2. Can I use cream cheese instead of mascarpone?
You can, but it will change the flavor and texture. Cream cheese is tangier and denser. If using it, let it come to room temperature and mix thoroughly until smooth.
3. How long do mini tiramisu cups last in the fridge?
They’ll stay fresh for up to 4 days when stored in an airtight container in the refrigerator. Don’t add cocoa powder until right before serving to avoid sogginess.
4. Are mini tiramisu cups safe for kids?
Yes—just omit the alcohol and ensure your espresso is decaf if caffeine is a concern. You can even swap coffee for hot chocolate or milk.
5. Can I freeze mini tiramisu cups?
While possible, freezing may affect the texture of the cream. If freezing, wrap tightly and consume within 2 weeks. Thaw in the fridge overnight before serving.
6. Do I need a piping bag for the cream?
Not at all. A spoon works fine, but a piping bag helps create clean, professional-looking layers—especially if using clear cups.
7. What type of cups work best?
Small glass cups, mini mason jars, or even plastic dessert shooters work beautifully. Choose clear ones to showcase the layers.
PrintElegant Tiramisu Cups – Creamy Mascarpone & Cocoa Layers
Mini Tiramisu Cups are a no-bake twist on the classic Italian dessert, layered with espresso-dipped ladyfingers and mascarpone cream in elegant, single-serve portions.
- Prep Time: 20 minutes
- Cook Time: 0 minutes
- Total Time: 4 hours 20 minutes (with chill)
- Yield: 6–8 mini cups 1x
Ingredients
-
16–20 ladyfingers (Savoiardi)
-
1 cup strong brewed espresso (cooled)
-
2 tbsp coffee liqueur (optional)
-
8 oz mascarpone cheese
-
1 cup heavy cream (cold)
-
1/3 cup granulated sugar
-
1 tsp vanilla extract
-
2 egg yolks (optional)
-
Unsweetened cocoa powder (for dusting)
-
Chocolate shavings (optional garnish)
Instructions
-
Brew espresso, mix in liqueur if using, and set aside to cool.
-
Whip the cold heavy cream to stiff peaks; set aside.
-
In a separate bowl, mix mascarpone, sugar, vanilla, and optional egg yolks until smooth.
-
Gently fold whipped cream into mascarpone mixture.
-
Dip ladyfingers quickly in espresso, layer into cups.
-
Add a layer of mascarpone cream.
-
Repeat layers of dipped ladyfingers and cream.
-
Chill for at least 4 hours.
-
Dust with cocoa powder before serving.
Notes
-
For alcohol-free version, omit liqueur.
-
Use decaf coffee for kid-friendly dessert.
-
Store refrigerated for up to 4 days.
-
Add berries or matcha for unique variations.