
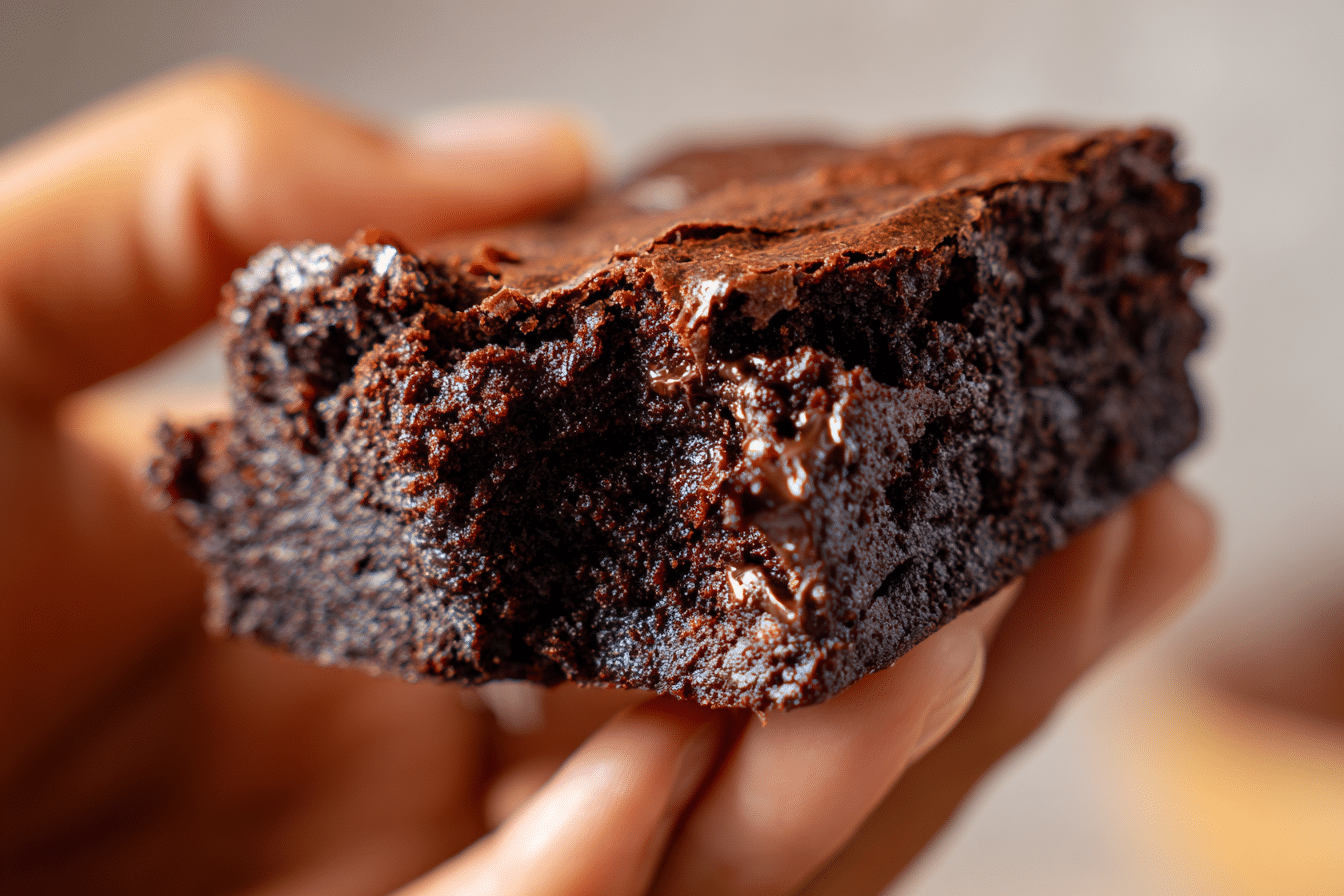
If you’ve ever wished brownies had a chewy, bouncy bite — meet your new favorite dessert: mochi brownies. These rich, chocolatey treats blend the deep flavor of classic brownies with the irresistible chewiness of mochi, thanks to one magic ingredient: sweet rice flour (mochiko).
Originating from Japanese and Hawaiian dessert traditions, mochi desserts have surged in popularity thanks to their unique texture — soft, stretchy, and tender. Mochi brownies take that concept and merge it with a chocolate lover’s dream. The result? A fudgy, chewy brownie with crisp edges and a glossy top, unlike anything you’ll find in a traditional batch.
Plus, mochi brownies are naturally gluten-free, easy to make in one bowl, and endlessly customizable. Whether you’re baking for a party, snack box, or just an afternoon treat, this recipe delivers a satisfying twist on a beloved classic.
Ingredients Overview
Each ingredient in mochi brownies serves a specific purpose, especially when dealing with the unique properties of mochiko flour.
-
Mochiko (Sweet Rice Flour)
This is the star ingredient. Unlike regular rice flour, mochiko creates that chewy, stretchy mochi texture. Do not substitute with all-purpose or regular rice flour — they won’t yield the same results. -
Unsalted Butter
Melted butter adds richness and moisture. You can also brown the butter for added depth and nuttiness. -
Chocolate
A mix of cocoa powder and chopped dark or semi-sweet chocolate provides intense chocolate flavor and a gooey, fudgy texture. Use high-quality chocolate bars rather than chips for best results. -
Granulated Sugar
Essential for sweetness and creating the signature glossy brownie crust. -
Eggs
Provide structure and stability while keeping the batter smooth and cohesive. Room temperature eggs work best. -
Cocoa Powder
Boosts the chocolate flavor. Use natural or Dutch-processed depending on your taste preference. -
Milk or Coconut Milk
Adds moisture and helps create the right batter consistency. Coconut milk gives a subtle tropical note and extra richness. -
Vanilla Extract
Rounds out the chocolate flavor with warmth and aroma. -
Salt
Enhances the chocolate and balances the sweetness.
Optional Add-ins
-
Chocolate Chips or Chunks
Stir into the batter for melted pockets of chocolate in every bite. -
Toasted Coconut or Sesame Seeds
Sprinkle on top before baking for added texture and a hint of nuttiness. -
Matcha Swirl or Peanut Butter Swirl
For a flavor twist and visual appeal.
Step-by-Step Instructions
1. Preheat and Prepare
Preheat your oven to 350°F (175°C). Lightly grease an 8×8-inch square baking pan and line with parchment paper for easy removal.
2. Melt the Butter and Chocolate
In a medium saucepan or microwave-safe bowl, melt the butter and chopped chocolate together until smooth. Let cool slightly.
3. Add Sugar, Eggs, and Vanilla
Whisk the sugar into the warm chocolate mixture until glossy. Beat in the eggs, one at a time, then stir in vanilla extract.
4. Add Dry Ingredients
Sift in the cocoa powder, mochiko flour, and salt. Stir gently to combine — the batter will be thick and elastic.
5. Pour in Milk
Gradually add milk or coconut milk, stirring until the batter is smooth and pourable but still thick.
6. Add Optional Extras
Fold in chocolate chips or other mix-ins, if using.
7. Bake
Pour the batter into your prepared pan and smooth the top. Bake for 40–45 minutes, or until the edges are set and a toothpick inserted comes out with moist crumbs. The top may puff slightly and settle as it cools.
8. Cool and Slice
Allow the brownies to cool completely in the pan before slicing. For best texture and clean edges, refrigerate for 1–2 hours before cutting.
Tips, Variations & Substitutions
Expert Tips
-
Don’t overmix: Stir just until smooth to maintain the chewy texture.
-
Use full-fat coconut milk for richer, silkier brownies.
-
Cool fully before slicing: Mochi brownies firm up as they rest, so resist cutting them too soon.
Flavor Variations
-
Matcha Mochi Brownies: Add 1–2 tsp of matcha powder for earthy depth.
-
Hojicha or Espresso: Stir in finely ground hojicha or espresso powder for a subtle roasted note.
-
Salted Caramel Swirl: Swirl in caramel and sprinkle sea salt on top before baking.
-
Black Sesame or Taro: Add paste swirls for a fusion-inspired twist.
Substitutions
-
Dairy-Free: Use coconut oil or plant-based butter and dairy-free chocolate.
-
Lower Sugar: Try coconut sugar or maple sugar, though the texture may be slightly different.
-
Vegan: Substitute eggs with a plant-based egg replacer; texture will be a bit softer but still chewy.
Serving Ideas & Occasions
Mochi brownies are versatile and hold up beautifully across settings. Serve them:
-
Chilled: For extra chewiness and structure.
-
Warmed up: Briefly reheated in the microwave for a soft, gooey bite.
-
With fruit: Pair with strawberries or raspberries for a contrast in texture and tartness.
-
As mini squares: Great for bento boxes, parties, or dessert bars.
-
Topped with ice cream: Vanilla or black sesame ice cream balances the dense chew.
These brownies are ideal for bake sales, birthdays, potlucks, or just a cozy night in.
Nutritional & Health Notes
Mochi brownies are naturally gluten-free, making them a great option for those avoiding wheat. While rich and indulgent, they offer:
-
Chewy satisfaction in small portions: A little goes a long way.
-
No processed flours: Just simple rice flour and whole ingredients.
-
Option to use dairy-free or lower-sugar ingredients for a more tailored treat.
Thanks to the high-fat content from butter and coconut milk, they’re filling and flavorful — so one square truly satisfies.
FAQs
Q1: What is mochiko and where can I find it?
A1: Mochiko is a type of sweet rice flour made from glutinous rice. It’s essential for the chewy texture in mochi-based desserts. Look for it in Asian grocery stores or online. Do not substitute with regular rice flour.
Q2: Can I make mochi brownies without chocolate?
A2: You can adapt the recipe to a vanilla or matcha mochi bar by omitting cocoa powder and chocolate, and adjusting sugar and flavorings accordingly — but it won’t have that classic brownie flavor.
Q3: Are mochi brownies supposed to be gooey in the middle?
A3: Yes — the center should be moist and chewy, not dry. The edges may firm up more, giving a pleasant contrast.
Q4: Can I freeze mochi brownies?
A4: Yes. Let them cool completely, slice, and wrap each square individually. Freeze for up to 2 months and thaw at room temperature or microwave briefly before serving.
Q5: How long do mochi brownies stay fresh?
A5: Store in an airtight container at room temperature for 2–3 days, or in the fridge for up to a week. Chilling improves texture and sliceability.
Q6: Why are my mochi brownies too dense or gummy?
A6: Too much liquid or overmixing can make the texture overly gummy. Stick to the listed amounts and avoid over-stirring the batter.
Q7: Can I make these in a larger pan?
A7: Yes, double the recipe and bake in a 9×13-inch pan. Start checking for doneness at 45 minutes.
Mochi Brownies – Chewy, Fudgy, and Irresistibly Chocolatey
Mochi brownies combine the fudgy richness of classic brownies with the chewy texture of mochi, thanks to sweet rice flour. Naturally gluten-free and deeply chocolatey.
- Prep Time: 15 minutes
- Cook Time: 15 minutes
- Total Time: 1 hour
- Yield: 16 brownies 1x
Ingredients
-
1/2 cup (1 stick) unsalted butter
-
4 oz dark or semi-sweet chocolate, chopped
-
3/4 cup granulated sugar
-
2 large eggs
-
1 tsp vanilla extract
-
1/2 cup unsweetened cocoa powder
-
1 cup mochiko (sweet rice flour)
-
1/2 tsp salt
-
3/4 cup milk or full-fat coconut milk
-
Optional: 1/2 cup chocolate chips, toasted sesame seeds
Instructions
-
Preheat oven to 350°F (175°C). Line an 8×8-inch pan with parchment paper.
-
Melt butter and chocolate together until smooth.
-
Stir in sugar, then beat in eggs and vanilla.
-
Sift in cocoa powder, mochiko, and salt. Stir to combine.
-
Add milk gradually, mixing until smooth and thick.
-
Fold in chocolate chips if using.
-
Pour into pan and bake 40–45 minutes, until set at the edges.
-
Cool fully before slicing. Chill for cleaner cuts.
Notes
-
Use only mochiko for best texture.
-
Coconut milk adds richness and subtle flavor.
-
Store chilled for optimal chewiness.