
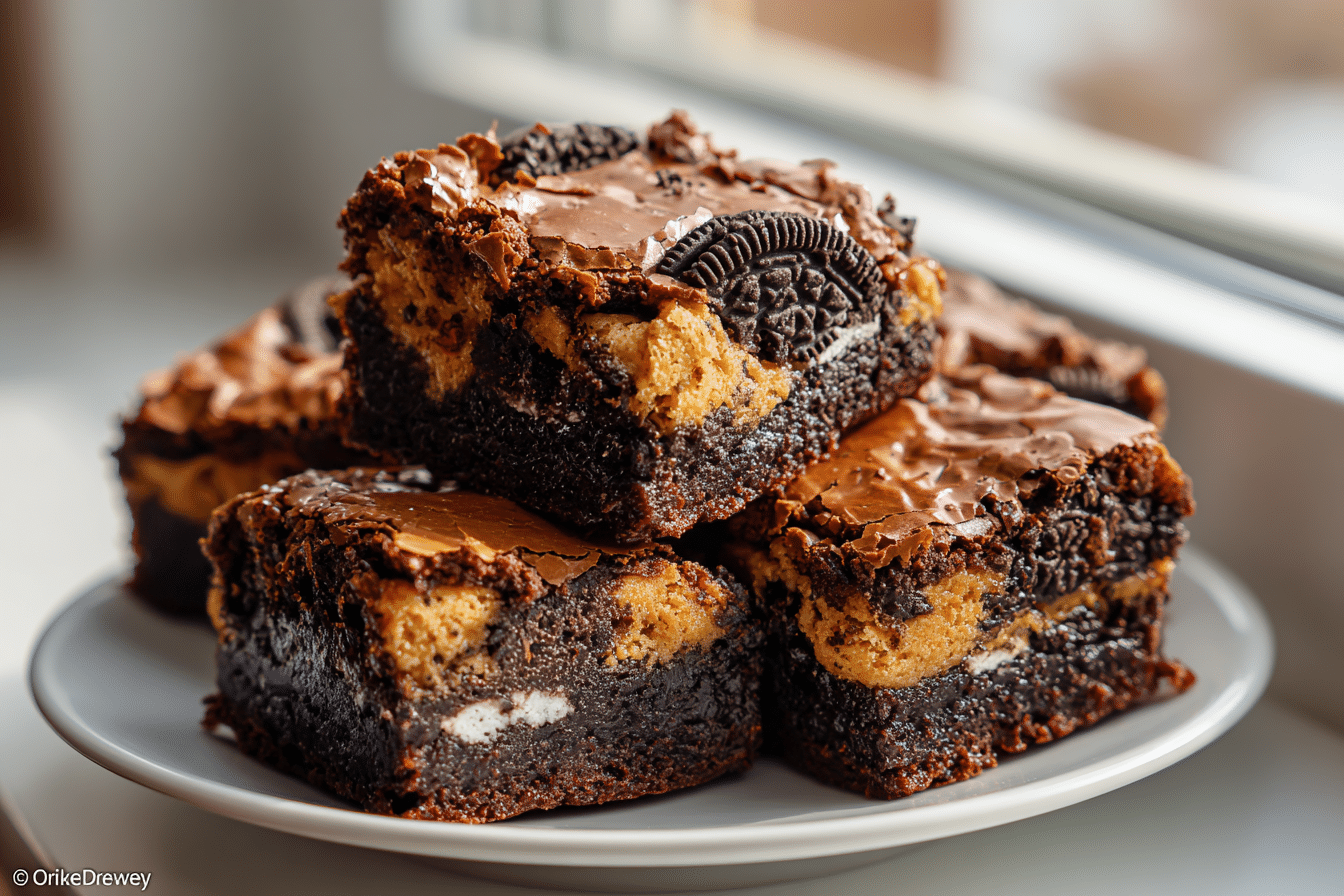
Brownies — the name may raise eyebrows, but one bite of this over-the-top, triple-layered dessert and you’ll understand the hype. These indulgent bars feature a chewy chocolate chip cookie base, a middle layer of Oreo cookies, and a rich, fudgy brownie top — baked together into one epic treat.
Believed to have gained internet fame via food blogs in the early 2010s, this dessert is all about unapologetic decadence. Whether you’re hosting a party, baking for friends, or just in the mood for something sinfully rich, these brownies will steal the show every time.
They’re gooey, chocolate-loaded, and ridiculously satisfying — everything you crave in a dessert, stacked into one bar.
Ingredients Overview
Each layer plays its part in creating texture and flavor harmony. Here’s what you’ll need and how each component contributes.
Chocolate Chip Cookie Dough (Bottom Layer)
This makes up the buttery, chewy foundation. You can use homemade dough or store-bought to save time.
Homemade Option:
-
All-purpose flour
-
Baking soda
-
Unsalted butter
-
Brown sugar + granulated sugar
-
Egg
-
Vanilla extract
-
Semi-sweet chocolate chips
Shortcut: Pre-made cookie dough (about 1½ cups) works beautifully.
Oreo Cookies (Middle Layer)
Classic Oreo cookies act as the sweet crunch in the middle. Their creamy center softens slightly when baked, creating a gooey, melt-in-your-mouth texture.
Swap Option: Try Golden Oreos, peanut butter-filled Oreos, or double-stuffed for extra drama.
Brownie Batter (Top Layer)
Rich and fudgy, this layer is the grand finale. You can use boxed brownie mix or make it from scratch for extra indulgence.
From-Scratch Brownies:
-
Unsweetened cocoa powder
-
Flour
-
Sugar
-
Eggs
-
Butter or oil
-
Vanilla extract
-
Baking powder or espresso powder (optional)
Tip: Use oil for a moist, fudgy finish or melted butter for deeper flavor.
Optional Add-Ins
-
Peanut butter cups: Tuck them between the Oreos.
-
Caramel drizzle: Swirl it into the brownie batter.
-
Sea salt: Sprinkle on top before baking for contrast.
Step-by-Step Instructions
This is a three-layer dessert, but it’s simple when broken down. Here’s how to get perfectly stacked slutty brownies every time.
1. Prepare Your Pan and Oven
Preheat your oven to 350°F (175°C). Line a 9×9-inch baking pan with parchment paper, leaving overhang on the sides for easy removal.
Pro Tip: Grease the parchment lightly so the cookie layer doesn’t stick.
2. Make or Press the Cookie Dough
If using homemade dough, cream butter and sugars together, add the egg and vanilla, then mix in dry ingredients and chocolate chips.
Press the cookie dough evenly into the bottom of your prepared pan, covering the entire surface.
Don’t overpack the dough — just press gently to level.
3. Add the Oreo Layer
Place a single layer of Oreo cookies on top of the cookie dough. You can break some cookies to fit the edges.
Tip: Use 16–20 Oreos depending on size of your pan and cookie layout.
4. Prepare the Brownie Batter
Use your favorite boxed mix or stir together a homemade version. Mix until just combined — don’t overbeat, especially if you want a fudgy texture.
Pour the brownie batter over the Oreo layer, spreading gently to cover everything evenly.
5. Bake
Bake at 350°F (175°C) for 35–40 minutes. A toothpick inserted in the center should come out with moist crumbs, not raw batter.
If using boxed mix, follow baking time on the box and adjust as needed.
6. Cool and Slice
Let the brownies cool in the pan for at least 1 hour (yes, it’s tough to wait!). This helps them firm up and slice cleanly.
Lift out using the parchment, cut into squares, and serve.
Tips, Variations & Substitutions
-
Add Espresso Powder: 1/2 tsp in the brownie batter deepens the chocolate flavor.
-
Peanut Butter Lovers: Swirl 2 tbsp of peanut butter into the brownie layer before baking.
-
Gluten-Free Version: Use gluten-free cookie dough, GF Oreos, and a gluten-free brownie mix.
-
Vegan Version: Use eggless cookie dough, vegan sandwich cookies, and flax egg brownies.
-
Nutty Crunch: Add chopped walnuts or pecans into the brownie batter.
Storage Tip: Keep leftovers in an airtight container at room temperature for 2–3 days, or refrigerate for up to a week.
Serving Ideas & Occasions
Slutty brownies are built for celebrations. Their stacked, gooey nature makes them perfect for:
-
Birthday parties and bake sales
-
Movie nights or weekend treats
-
Holiday dessert trays
-
Potlucks and office events
-
Ice cream pairings – serve warm with vanilla or coffee ice cream for next-level decadence
They also make amazing gifts — wrap cooled squares in parchment and ribbon for a fun edible present.
Nutritional & Health Notes
These are undeniably indulgent — each square is rich in sugar, fat, and carbs. That said, they’re meant to be a treat, not a daily snack.
On average:
-
Calories: ~300–400 per square (depending on size and ingredients)
-
Sugar: High — reduce sugar in the cookie dough or use dark chocolate to cut sweetness
-
Custom Options: Use applesauce or Greek yogurt in your brownie mix to lighten it slightly
Enjoy in moderation, and serve small slices — they’re super rich!
FAQs
Q1: Why are they called “Slutty” Brownies?
The name was coined for fun — it reflects how indulgent and “extra” the dessert is, combining three sinful layers into one bar. It’s cheeky, not offensive, and the recipe has gone viral thanks to its over-the-top deliciousness.
Q2: Can I make slutty brownies in advance?
Yes! In fact, they taste even better the next day. Cool completely, slice, and store in an airtight container. Refrigerate if keeping for more than 2 days.
Q3: Can I freeze them?
Absolutely. Wrap individual squares in parchment or plastic wrap, then store in a zip-top bag in the freezer for up to 2 months. Thaw at room temperature or microwave briefly before serving.
Q4: Can I use homemade brownies and cookie dough?
Definitely! Both layers can be made from scratch for better flavor and texture control. Just make sure the total bake time allows the center to cook through.
Q5: What if the center is too gooey?
It may need extra time in the oven. Cover loosely with foil if the top is browning too fast. Also, let them cool fully to help the layers set.
Q6: What can I use instead of Oreos?
You can use any sandwich cookie you like — Biscoff, Nutter Butters, or gluten-free alternatives. Even chocolate mint cookies work great for a seasonal twist.
Q7: Can I make these in a 9×13 pan?
Yes, but double the recipe for best results and adjust the baking time. Start checking around 40–45 minutes, and use a toothpick to gauge doneness.
PrintOreo Cookie Dough Brownies – Easy Sharable Dessert
Brownies are a decadent, triple-layered dessert with chocolate chip cookie dough, Oreo cookies, and rich brownie batter — baked into one outrageous treat.
- Prep Time: 20 minutes
- Cook Time: 40 minutes
- Total Time: 1 hour
- Yield: 16 squares 1x
Ingredients
Cookie Layer:
-
1/2 cup unsalted butter, softened
-
1/3 cup granulated sugar
-
1/3 cup brown sugar
-
1 egg
-
1 tsp vanilla extract
-
1¼ cups all-purpose flour
-
1/2 tsp baking soda
-
1/4 tsp salt
-
3/4 cup chocolate chips
Oreo Layer:
-
16–20 Oreo cookies
Brownie Layer:
-
1 box brownie mix + ingredients called for
OR -
1/2 cup unsalted butter (melted)
-
1 cup sugar
-
2 eggs
-
1/3 cup unsweetened cocoa powder
-
1/2 cup flour
-
1/4 tsp salt
-
1/2 tsp vanilla extract
Instructions
-
Preheat oven to 350°F (175°C). Line a 9×9-inch pan with parchment.
-
Prepare cookie dough: cream butter and sugars, beat in egg and vanilla, mix in dry ingredients and chocolate chips.
-
Press cookie dough evenly into the pan.
-
Layer Oreos over the cookie dough in a single layer.
-
Prepare brownie batter (boxed or homemade), then pour over Oreos and spread evenly.
-
Bake for 35–40 minutes, until a toothpick comes out with moist crumbs.
-
Cool completely before slicing.
Notes
-
Let cool 1–2 hours before cutting.
-
Use espresso powder for deeper chocolate flavor.
-
Store in airtight container up to 5 days.