
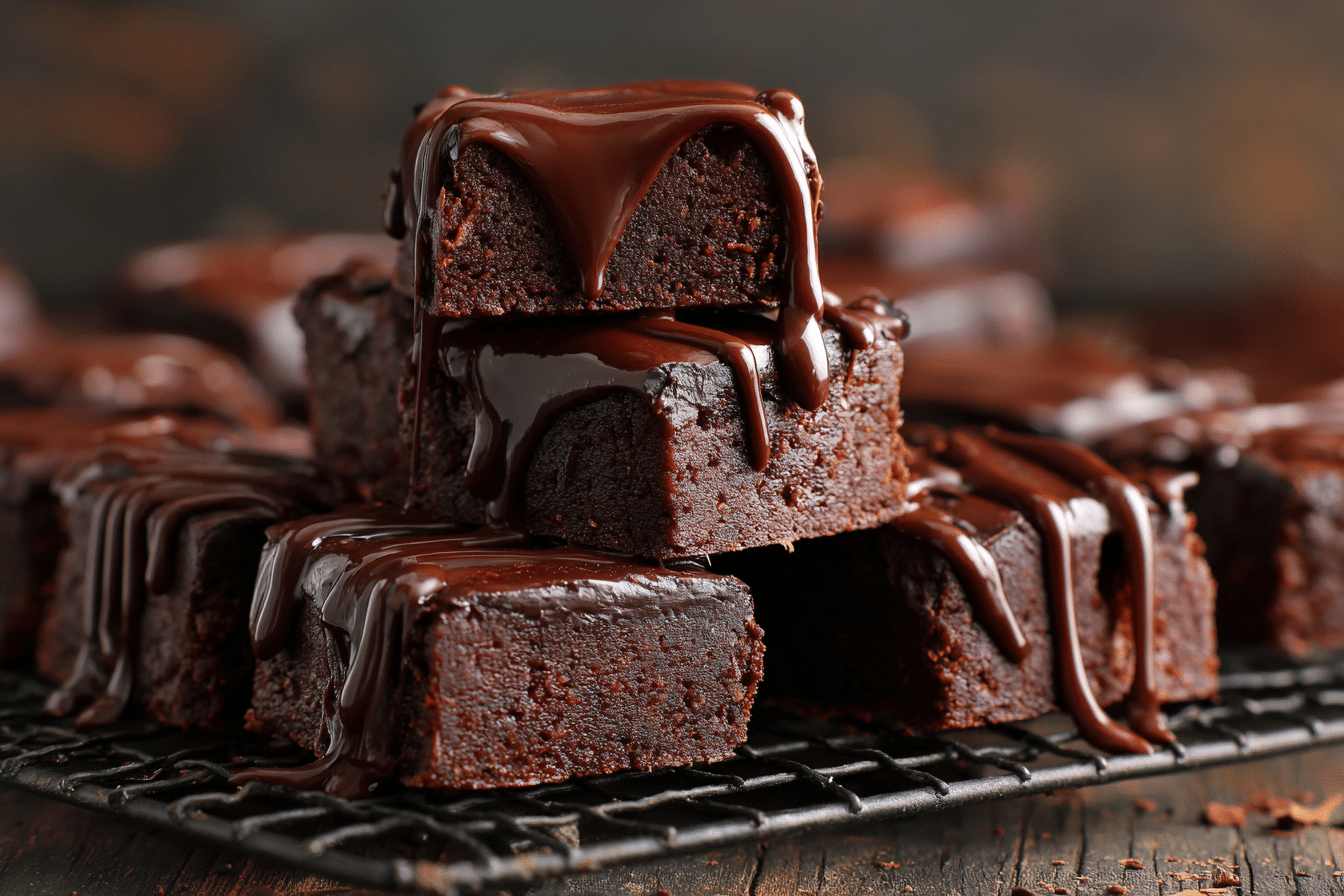
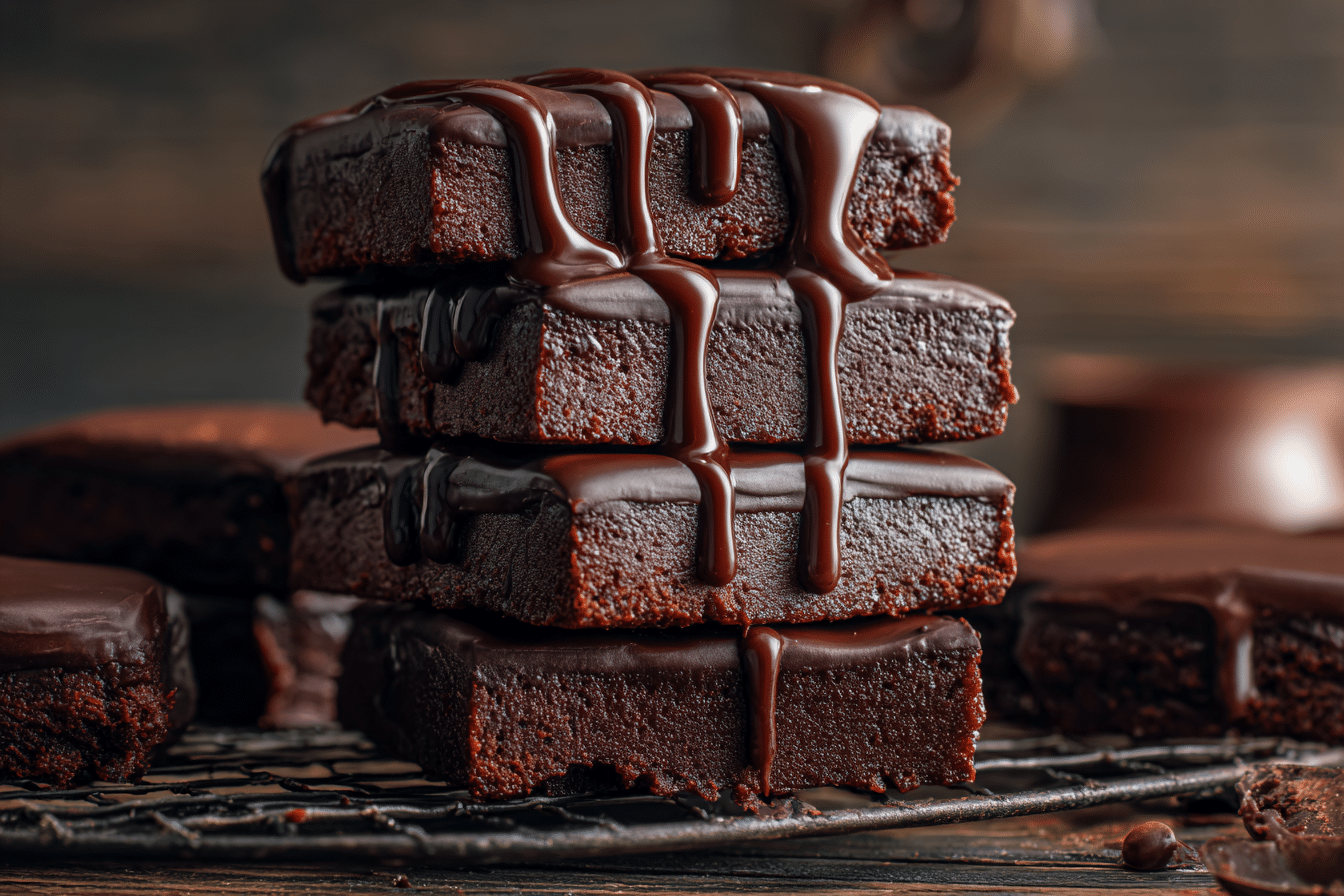
No-bake brownies are the ultimate answer to chocolate cravings when you don’t want to turn on the oven. Packed with rich cocoa flavor, naturally sweetened, and delightfully chewy, these brownies come together in minutes with just a few wholesome ingredients.
This recipe is perfect for warm-weather days, busy schedules, or anytime you want a dessert that feels indulgent without the effort. There’s no mixing bowl hierarchy, no complicated steps—just one process, one pan, and a chocolatey reward.
These brownies skip flour and eggs entirely, relying instead on dates, nuts, and cocoa powder to form a fudgy, dense square that rivals any baked version. You’ll taste deep chocolate, hints of nutty richness, and a melt-in-your-mouth texture that satisfies with every bite. Keep them in the fridge or freezer for the perfect anytime treat.
Ingredients Overview
Medjool Dates:
The natural sweetener and binder in this recipe. Dates provide moisture, chewiness, and a caramel-like flavor. Be sure to remove the pits and soak in warm water if they’re dry. Deglet Noor dates can work too, but Medjool is ideal for richness.
Unsweetened Cocoa Powder:
Brings intense chocolate flavor. Use Dutch-process for a smoother, deeper taste, or natural cocoa powder for a slightly more bitter edge. Avoid sweetened cocoa mixes, as they throw off the flavor balance.
Nuts (Walnuts or Almonds):
Provide structure, texture, and flavor. Walnuts are classic in brownies for their soft crunch and buttery flavor, while almonds give a firmer bite. You can use a mix or choose your favorite.
Salt:
A pinch enhances the chocolate and balances the sweetness. Don’t skip it—it makes a noticeable difference.
Vanilla Extract:
Adds depth and rounds out the overall flavor. Use real vanilla extract if possible for the best results.
Optional Add-ins:
Chopped dark chocolate, mini chocolate chips, shredded coconut, or a swirl of nut butter can take these to the next level without adding baking time.
Step-by-Step Instructions
1. Prep the Pan:
Line an 8×8-inch baking dish with parchment paper, leaving some overhang for easy removal. Set aside.
2. Pulse the Nuts:
Add the nuts to a food processor and pulse until finely ground, but not so much that it becomes nut butter. You want a crumbly, coarse texture that still has a bit of bite.
3. Add Dates and Cocoa:
Add the pitted dates, cocoa powder, vanilla, and salt. Pulse until everything combines into a thick, sticky mixture. The dough should clump together easily when pressed. If it feels too dry, add 1–2 teaspoons of water and pulse again.
4. Press into Pan:
Transfer the mixture into your prepared pan. Use your hands or a spatula to press it down firmly and evenly. It helps to place a piece of parchment paper on top and press with the bottom of a glass for a smooth finish.
5. Chill:
Refrigerate for at least 1 hour, or freeze for 20–30 minutes until firm. This sets the brownies and makes them easier to slice.
6. Slice and Serve:
Once chilled, lift the brownies out using the parchment overhang. Cut into squares or bars and enjoy. Store leftovers in an airtight container in the fridge for up to a week, or freeze for longer.
Tips, Variations & Substitutions
Tips:
-
If your dates are dry, soak them in hot water for 10 minutes and pat dry before using.
-
Press the mixture down firmly to avoid crumbly brownies.
-
Taste and adjust the cocoa if you prefer a richer or milder chocolate flavor.
Flavor Variations:
-
Chocolate Peanut Butter: Swirl in 2 tablespoons of natural peanut butter before pressing into the pan.
-
Coconut Brownies: Mix in 1/4 cup unsweetened shredded coconut and top with more before chilling.
-
Espresso Kick: Add 1/2 teaspoon of instant espresso powder to deepen the chocolate flavor.
Substitutions:
-
Use cashews or pecans in place of almonds or walnuts.
-
Add a tablespoon of maple syrup if you prefer a slightly sweeter result.
-
Replace vanilla with almond extract for a twist.
Serving Ideas & Occasions
These no-bake brownies are delicious on their own, but they’re also easy to dress up for special occasions or snack-time indulgence.
Serving Ideas:
-
Top with flaky sea salt for a gourmet finish.
-
Drizzle with melted dark chocolate and let it set before slicing.
-
Serve with a scoop of vanilla or coconut ice cream for a simple dessert.
Occasions:
-
After-school or workday snacks.
-
Summer parties or potlucks when oven use is limited.
-
Guilt-free midnight treats from the freezer.
-
Clean-eating dessert options for those avoiding refined sugar.
Their simple prep makes them a go-to option for beginner cooks and seasoned bakers alike.
Nutritional & Health Notes
These brownies are naturally gluten-free, dairy-free, and egg-free. Made with whole food ingredients like dates and nuts, they offer fiber, healthy fats, and a dose of antioxidants from the cocoa.
They’re energy-dense but nutrient-rich, making them a smart choice for a post-workout snack or a satisfying dessert. Portion control is key—they’re small but filling.
For a lower-calorie option, you can cut them into smaller squares or use fewer nuts and more dates, though this will slightly change the texture.
FAQs
Can I make these no-bake brownies without a food processor?
A food processor is the best tool for achieving the right texture, but you can try using a high-powered blender. Just be sure to scrape down the sides often. Chopping everything finely by hand is possible, but very labor-intensive.
Are these brownies freezer-friendly?
Yes! These brownies freeze beautifully. Slice and store them in a freezer-safe container with parchment between layers. Thaw for a few minutes before serving or eat straight from the freezer.
Can I make them nut-free?
Yes. Substitute sunflower seeds or pumpkin seeds in place of nuts. You can also try using oat flour for a slightly different texture.
Do they taste like regular brownies?
They’re different from traditional baked brownies—they’re more dense, chewy, and naturally sweet—but still rich and satisfying with bold chocolate flavor.
How long do they last in the fridge?
Stored in an airtight container, they’ll keep well for up to one week. Keep chilled to maintain firmness and freshness.
Can I use cocoa nibs or melted chocolate instead of cocoa powder?
Cocoa powder is essential for the base flavor and dry texture balance. You can add cocoa nibs or melted chocolate as a mix-in or topping, but not as a full substitute.
What if the mixture is too dry or crumbly?
If the mixture doesn’t hold together when pressed, add 1–2 teaspoons of water and pulse again until sticky and cohesive.
Quick No-Bake Brownies with a Thick, Fudgy Texture
Rich, chewy no-bake brownies made with wholesome ingredients like dates, nuts, and cocoa—ready in minutes with no oven required.
- Prep Time: 15 minutes
- Cook Time: 0 minutes
- Total Time: 1 hour 15 minutes (including chill time)
- Yield: 12 brownies 1x
Ingredients
1 1/2 cups Medjool dates, pitted
1 cup raw walnuts or almonds
1/3 cup unsweetened cocoa powder
1/2 tsp vanilla extract
1/4 tsp salt
Instructions
-
Line an 8×8-inch pan with parchment paper.
-
In a food processor, pulse nuts until finely ground.
-
Add dates, cocoa powder, vanilla, and salt. Process until sticky and combined.
-
Press mixture into the pan firmly and evenly.
-
Chill for 1 hour in the fridge or 30 minutes in the freezer.
-
Slice into squares and serve.
Notes
Soak dry dates in warm water for 10 minutes. Store brownies in fridge up to 1 week or freeze for longer.